Set up SCIM EnterpriseEnterprise +
The System for Cross-Domain Identity Management (SCIM) makes user data more secure and simplifies the admin and end-user lifecycle experience by automating user identities and groups. You can create or disable user identities in your Identity Provider (IdP), and SCIM will automatically make those changes in near real-time downstream in dbt.
Prerequisites
To configure SCIM in your dbt environment:
- You must be on an Enterprise or Enterprise+ plan.
- You must be using Okta or Entra ID as your SSO provider.
- You must have permissions to configure the account settings in dbt and change application settings in Okta.
- If you have IP restrictions enabled, you must add Okta's IPs to your allowlist.
Supported features
The currently available supported features for SCIM are:
- User provisioning and de-provisioning
- User profile updates
- Group creation and management
- Importing groups and users
When users are provisioned, the following attributes are supported
- Username
- Family name
- Given name
The following IdPs are supported in the dbt UI:
If your IdP isn’t on the list, it can be supported using dbt APIs.
Set up dbt
To retrieve the necessary dbt configurations for use in Okta or Entra ID:
-
Navigate to your dbt Account settings.
-
Select Single sign-on from the left-side menu.
-
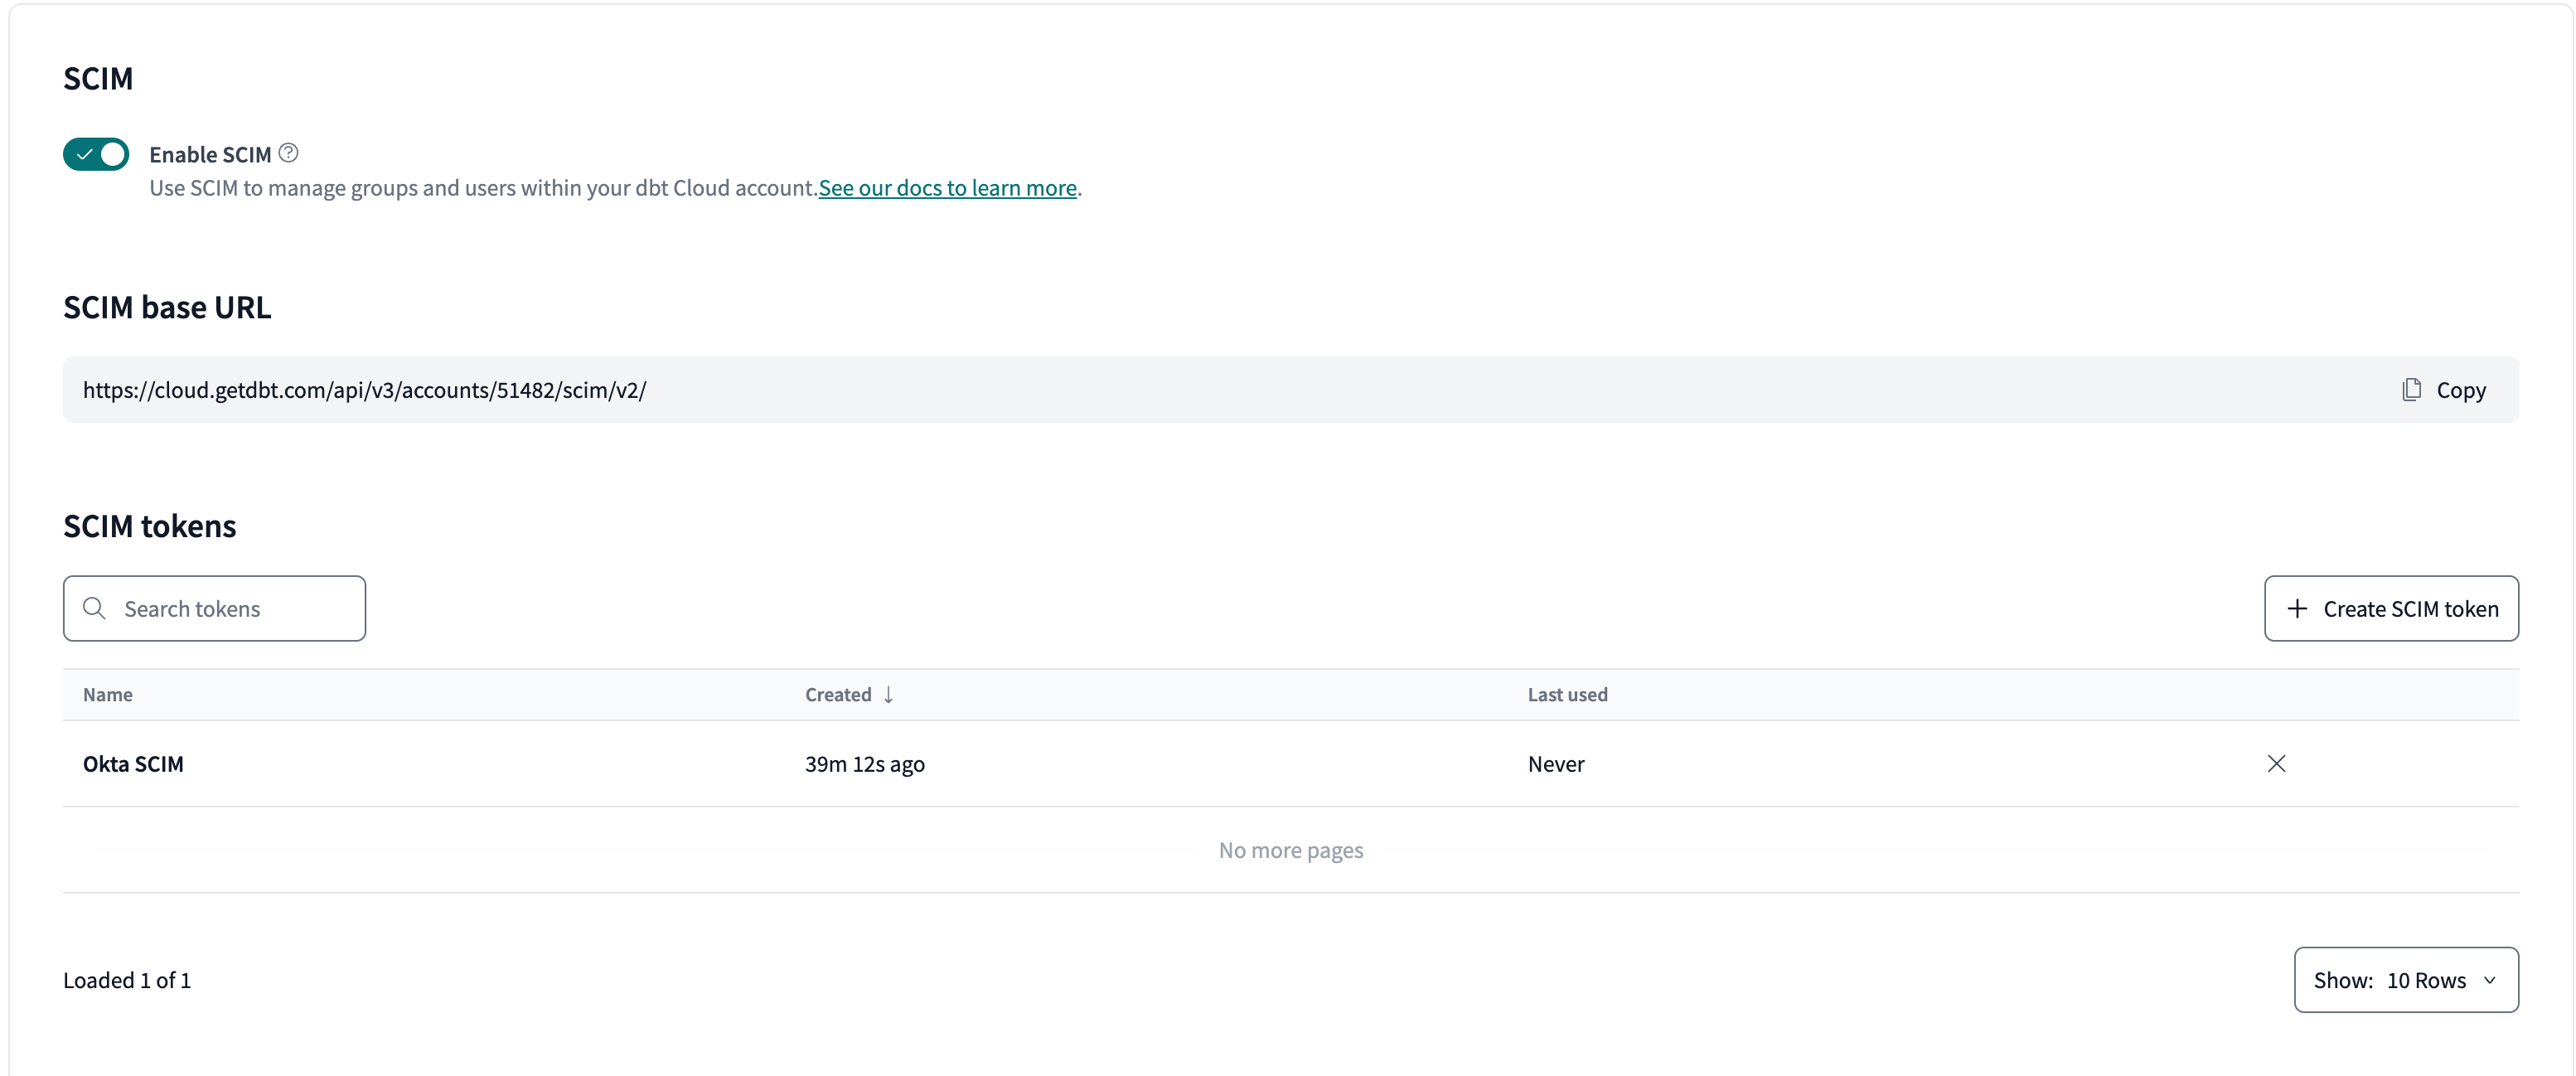
Scroll to the bottom of your SSO configuration settings and click Enable SCIM.
-
Record the SCIM base URL field for use in a later step.
-
Click Create SCIM token.
noteTo follow best practices, you should regularly rotate your SCIM tokens. To do so, follow these same instructions you did to create a new one. To avoid service disruptions, remember to replace your token in your IdP before deleting the old token in dbt.
-
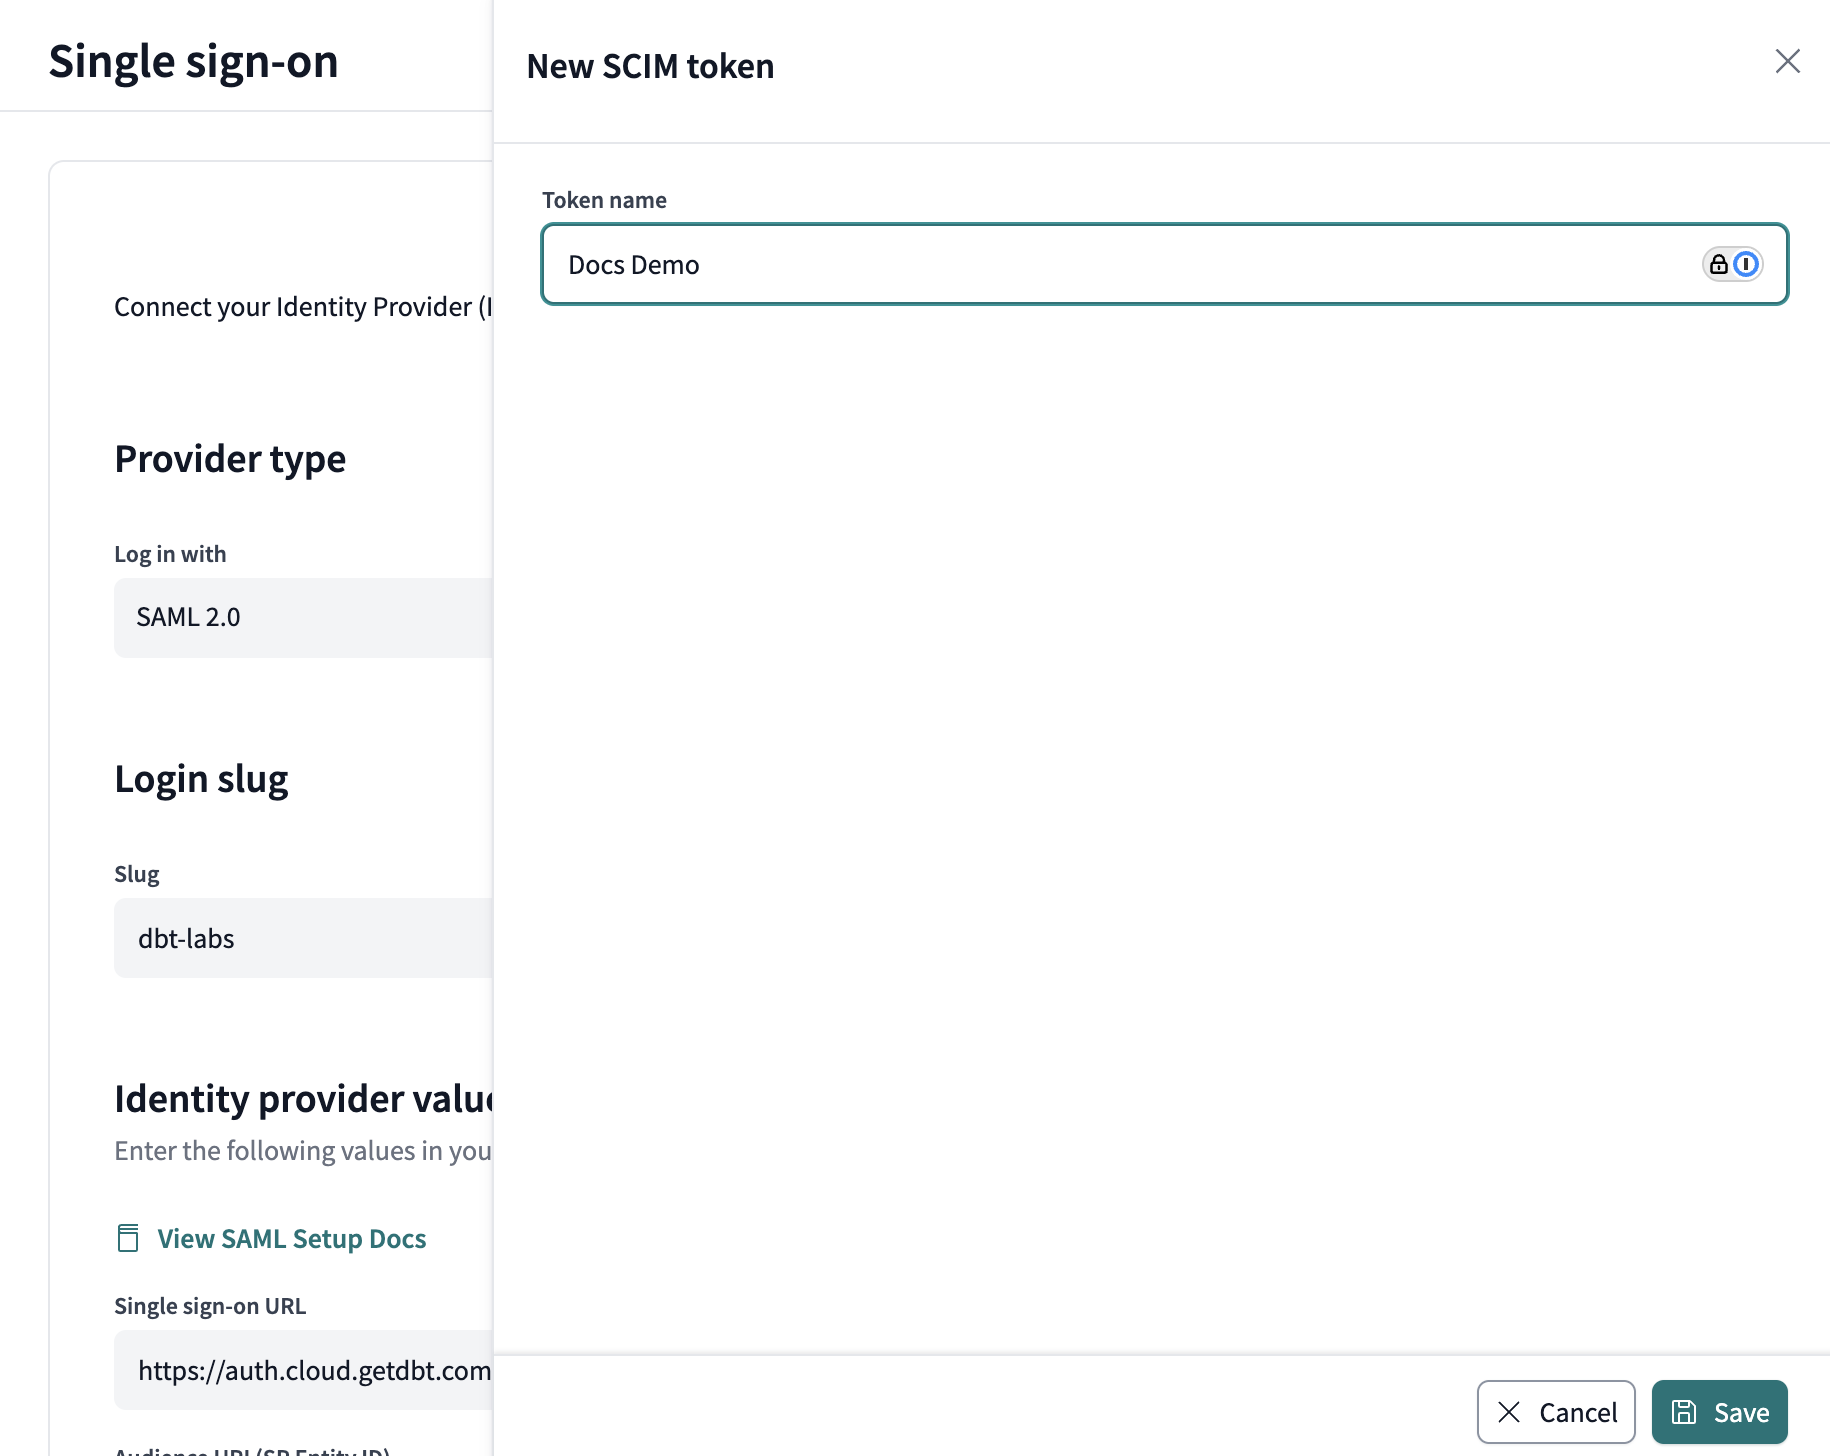
In the pop-out window, give the token a name that will make it easily identifiable. Click Save.
-
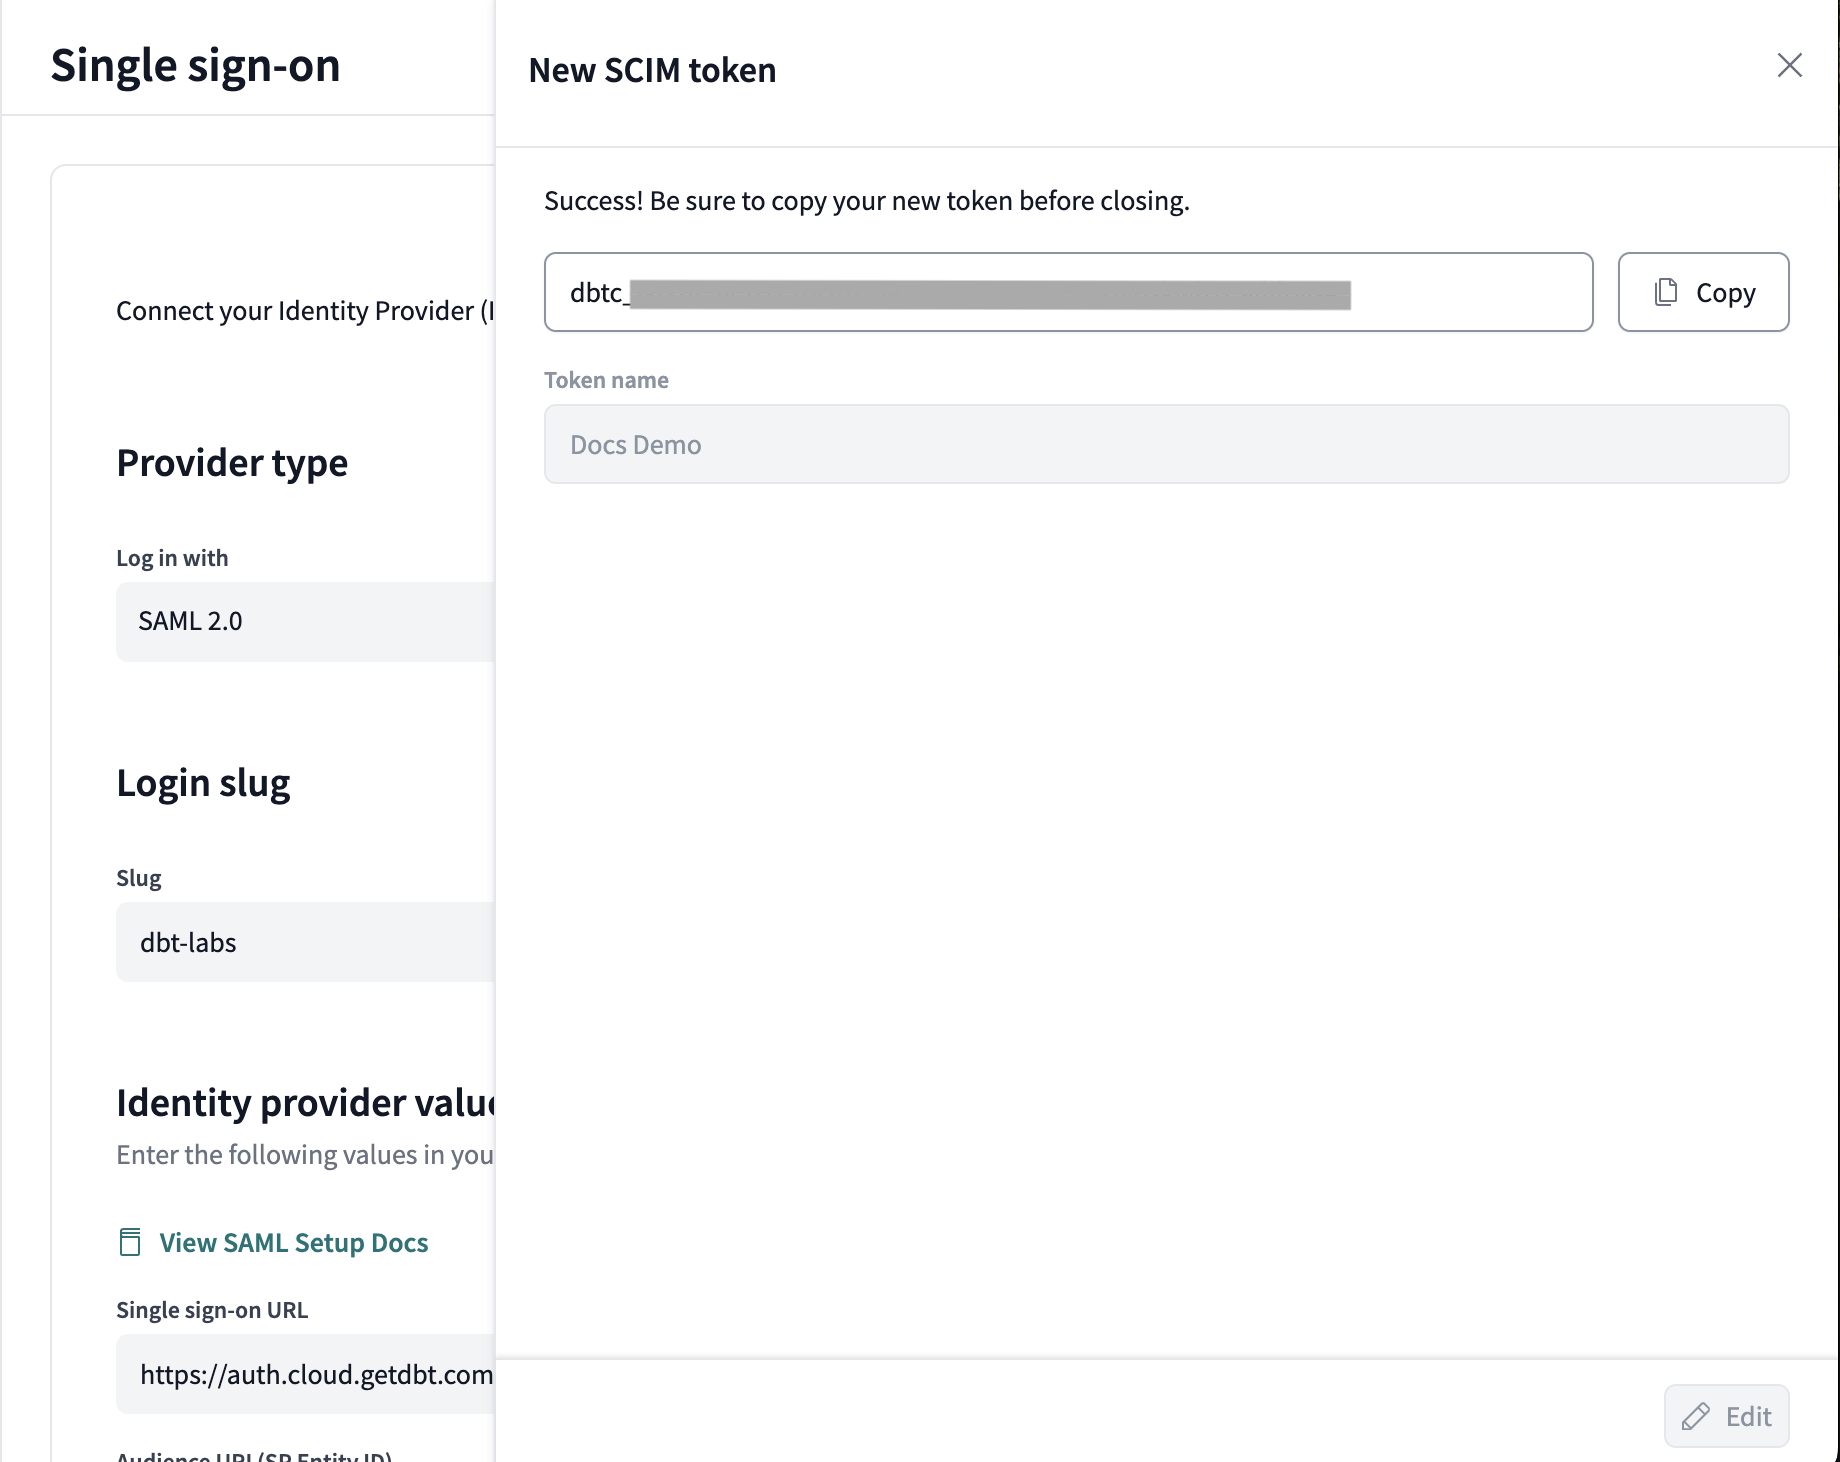
Copy the token and record it securely, as it will not be available again after you close the window. You must create a new token if you lose the current one.
-
(Optional) Manual updates are turned off by default for all SCIM-managed entities, including the ability to invite new users manually. This ensures SCIM-managed entities stay in sync with the IdP, and we recommend keeping this setting disabled.
- However, if you need to make manual updates (like update group membership for a SCIM-managed group), you can enable this setting by clicking Allow manual updates.
dbt maps SCIM groups to its own groups, so you can assign licenses to SCIM groups using the group name as an identifier. Currently, setting a license type directly as an attribute on the SCIM group isn't supported.
SCIM configuration for Okta
Please complete the setup SSO with Okta steps before configuring SCIM settings.
Set up Okta
-
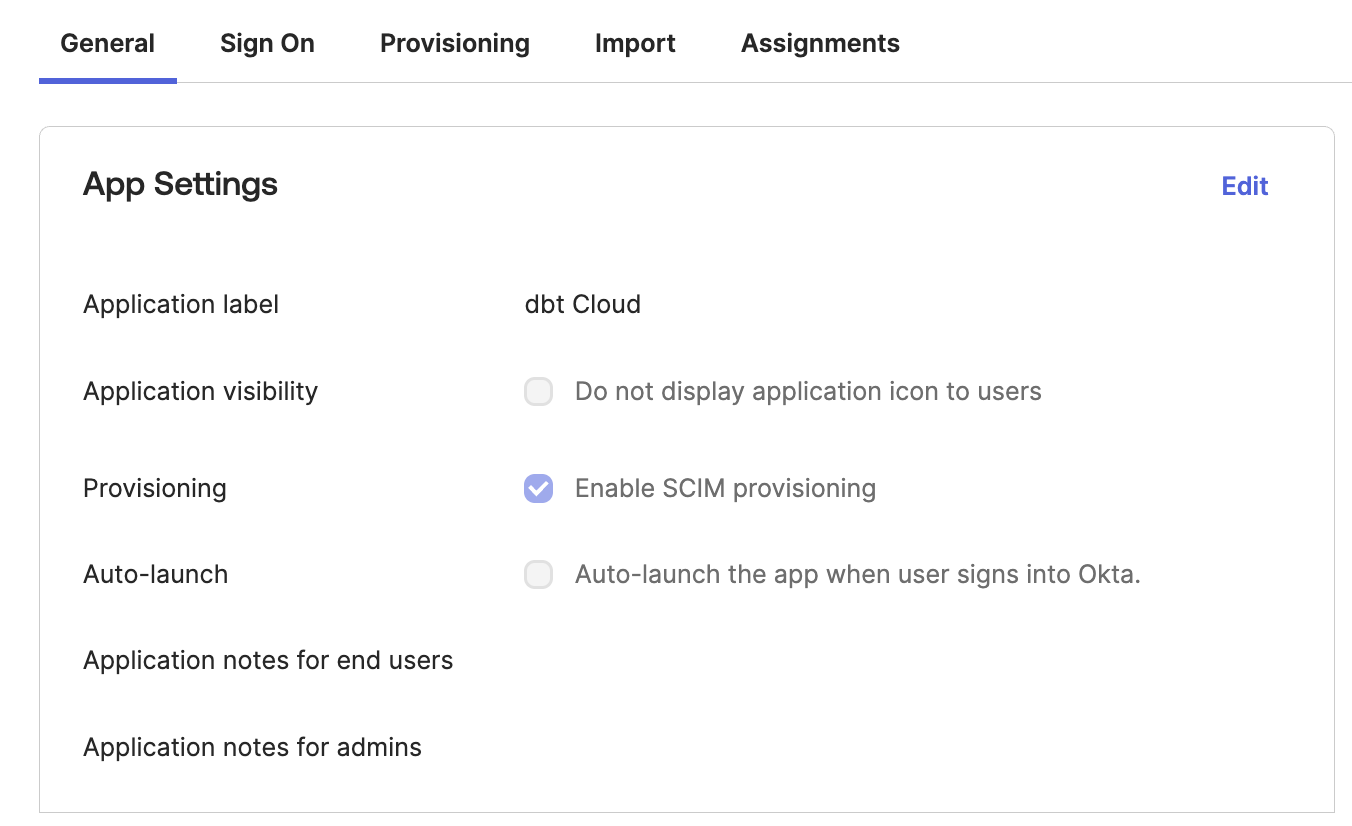
Log in to your Okta account and locate the app configured for the dbt SSO integration.
-
Navigate to the General tab and ensure Enable SCIM provisioning is checked or the Provisioning tab will not be displayed.
-
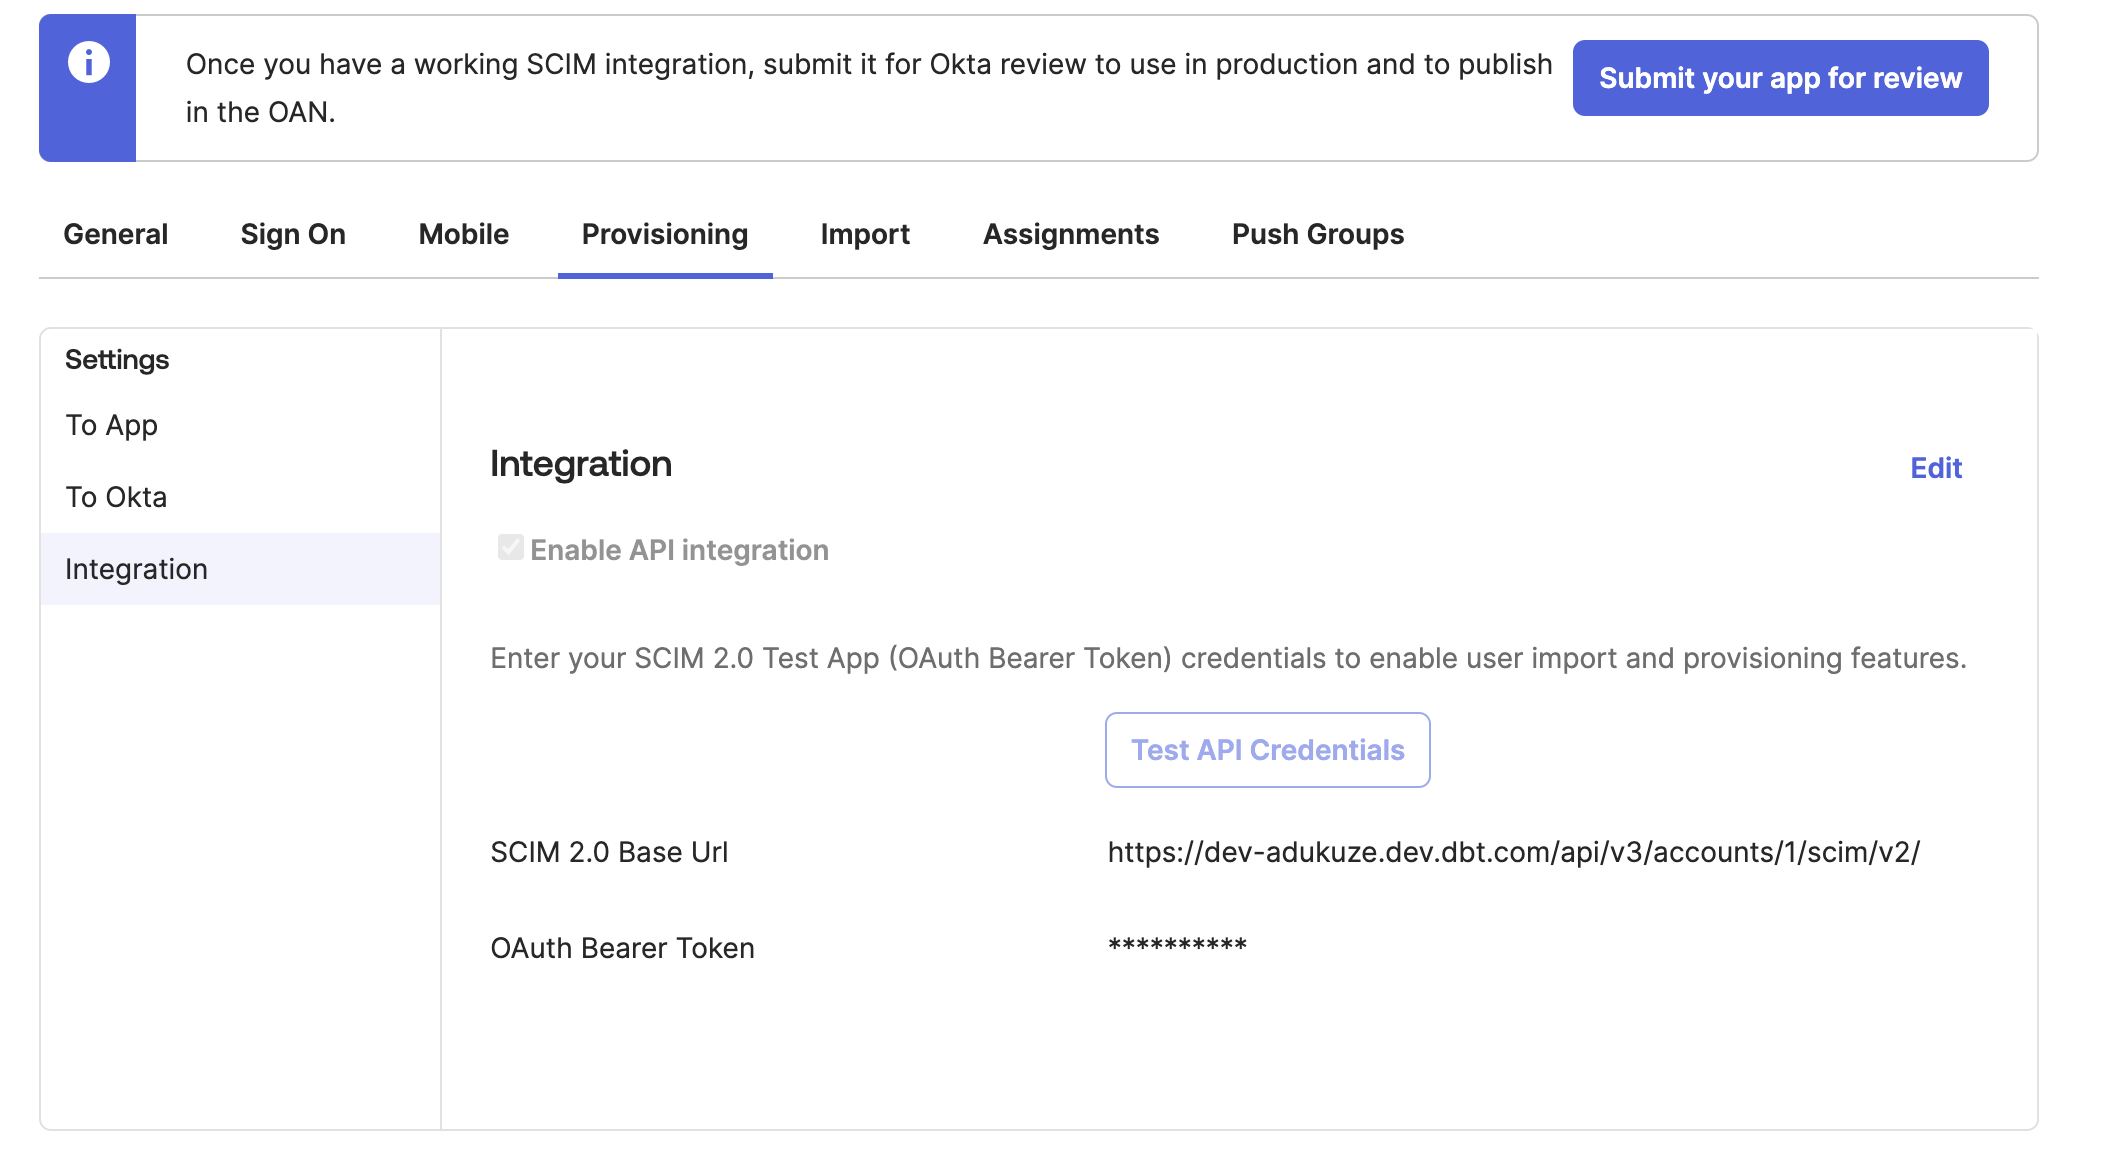
Open the Provisioning tab and select Integration.
-
Paste the SCIM base URL from dbt to the first field, then enter your preferred Unique identifier field for users — we recommend
userName. -
Click the checkboxes for the following Supported provisioning actions:
- Push New Users
- Push Profile Updates
- Push Groups
-
From the Authentication mode dropdown, select HTTP Header.
-
In the Authorization section, paste the token from dbt into the Bearer field.
-
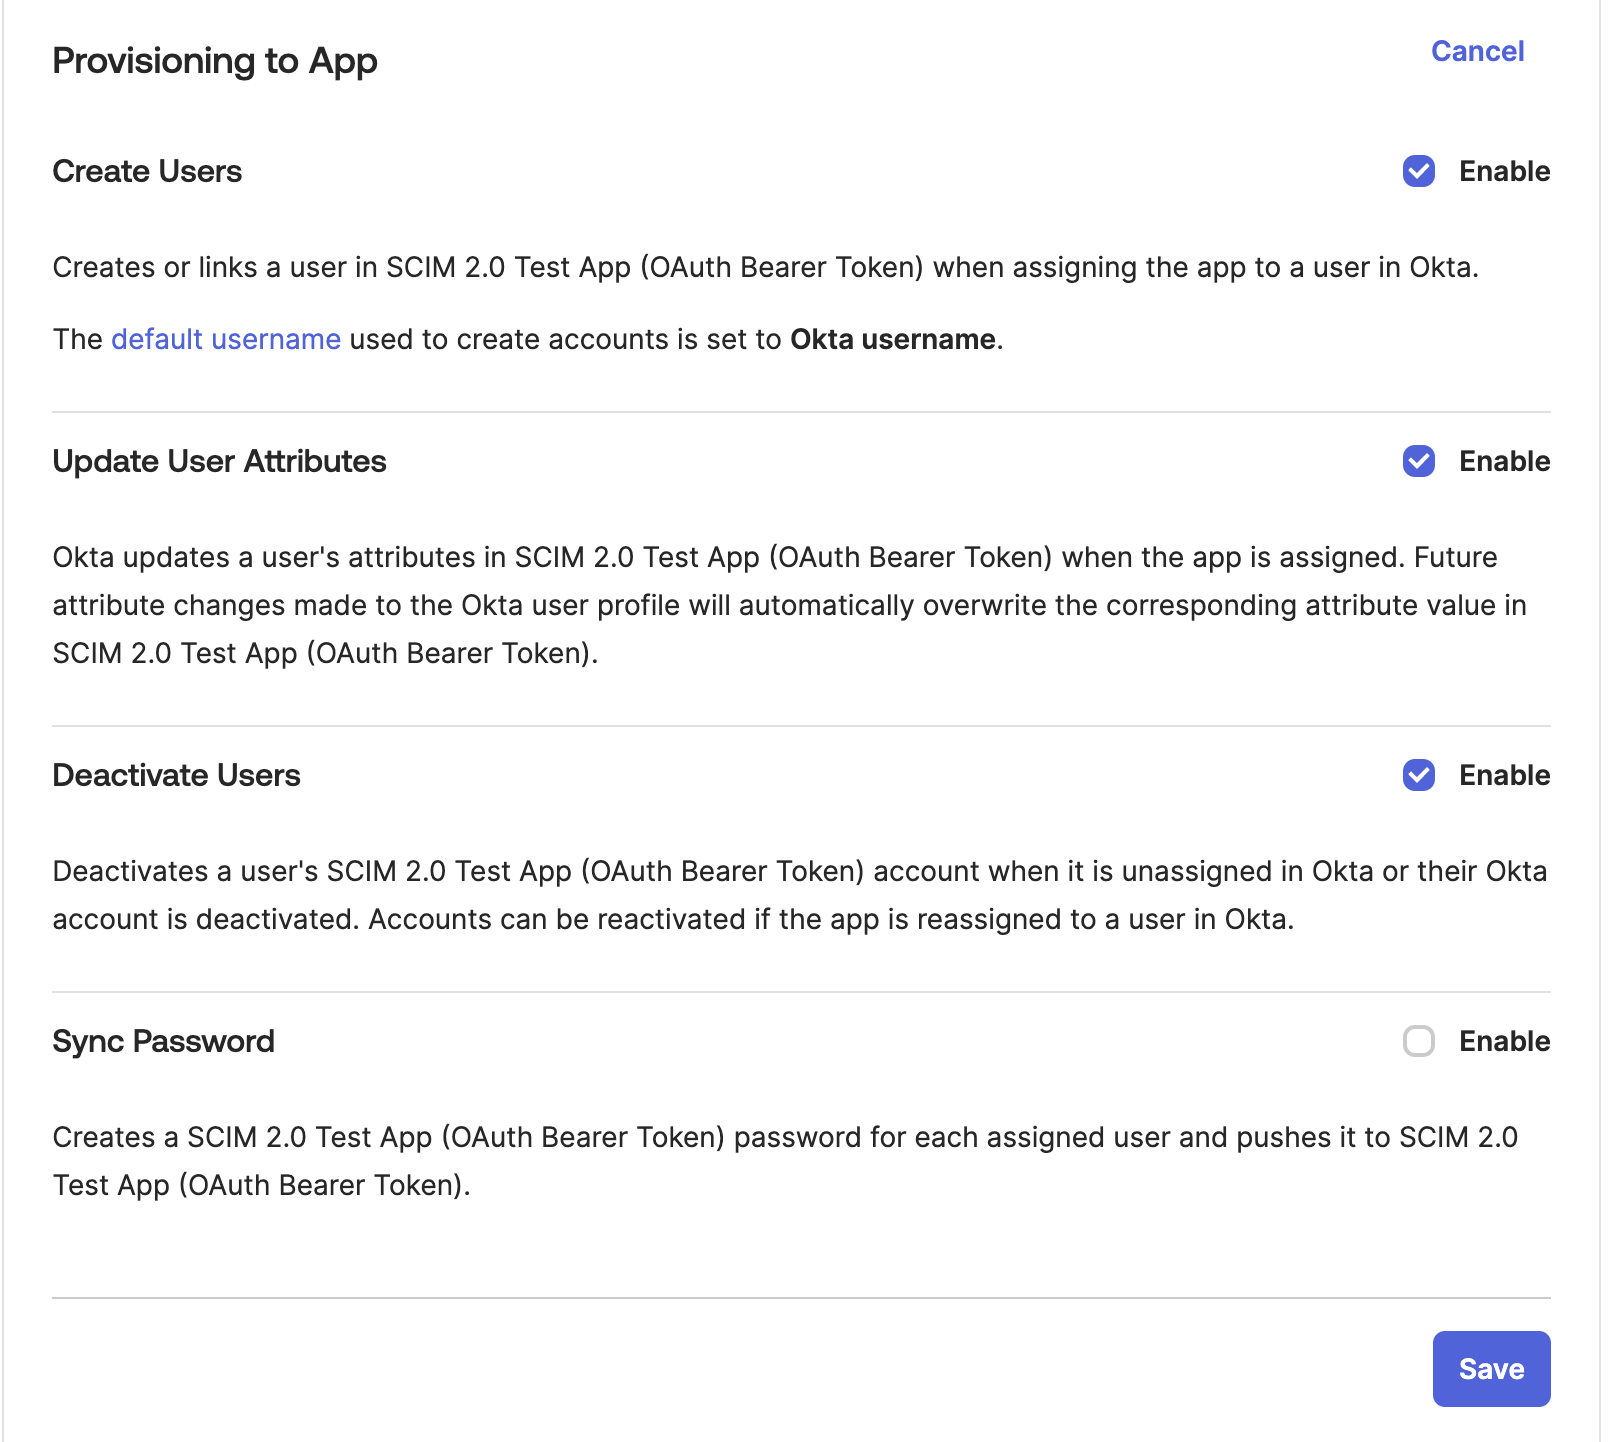
Ensure that the following provisioning actions are selected:
- Create users
- Update user attributes
- Deactivate users
-
Test the connection and click Save once completed.
You've now configured SCIM for the Okta SSO integration in dbt.
Existing Okta integrations
If you are adding SCIM to an existing Okta integration in dbt (as opposed to setting up SCIM and SSO concurrently for the first time), there is some functionality you should be aware of:
- Users and groups already synced to dbt will become SCIM-managed once you complete the SCIM configuration.
- You can leverage SCIM to import and manage existing dbt groups. Update the groups in your IdP with the same naming convention used for dbt groups. New users, groups, and existing profile changes will be automatically imported into dbt.
- Ensure the Import users and profile updates and Import groups checkboxes are selected in the Provisioning settings tab in the Okta SCIM configuration.
- Read more about this feature in the Okta documentation.
SCIM configuration for Entra ID beta
Please complete the setup SSO with Entra ID steps before configuring SCIM settings.
Set up Entra ID
- Log in to your Azure account and open the Entra ID configurations.
- From the sidebar, under Manage, click Enterprise Applications.
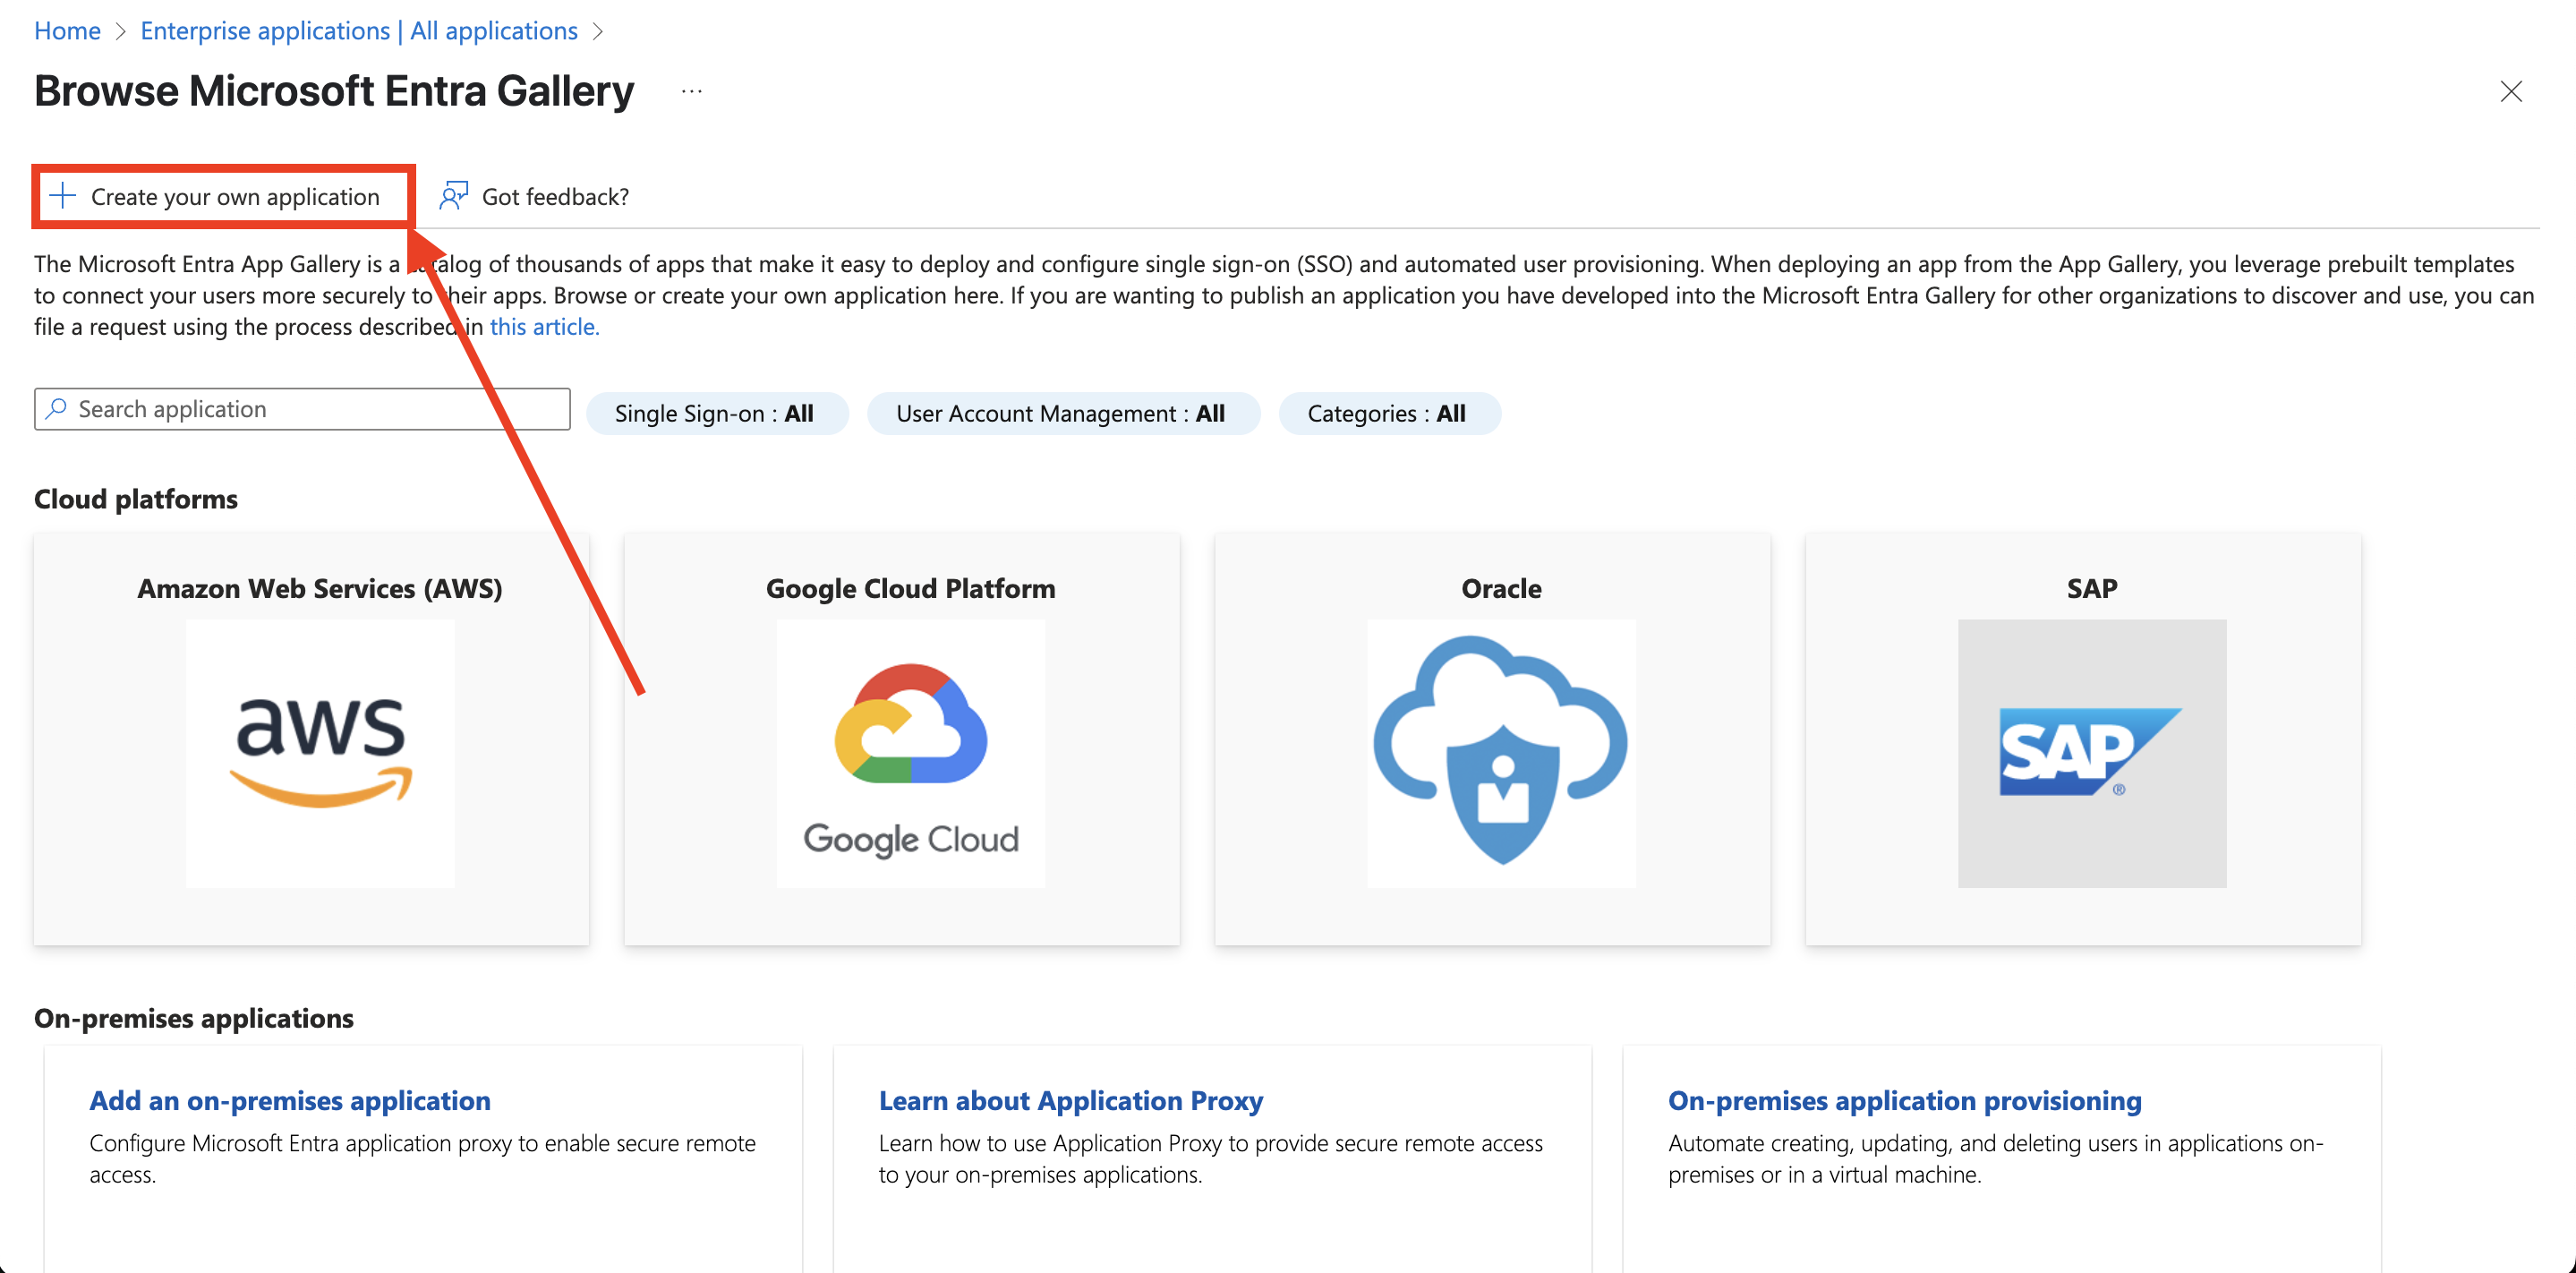
- Click New Application and select the option to Create your own application.
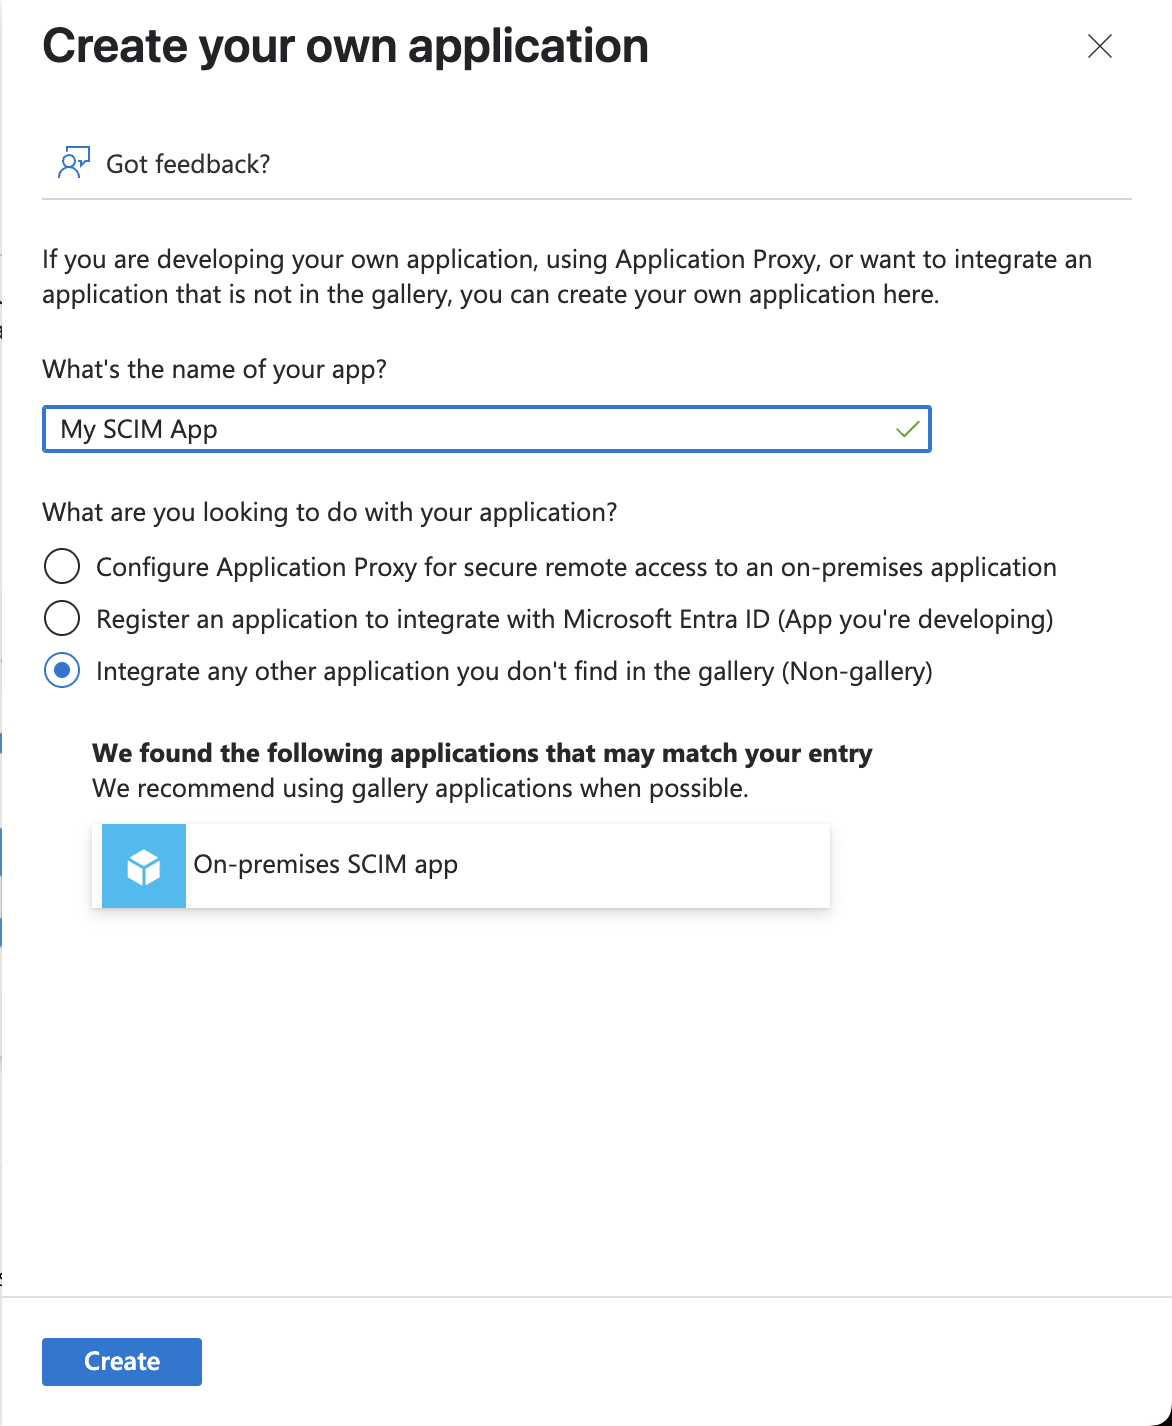
- Give your app a unique name and ensure the Integrate any other application you don't find in the gallery (Non-gallery) field is selected. Ignore any prompts for existing apps. Click Create.
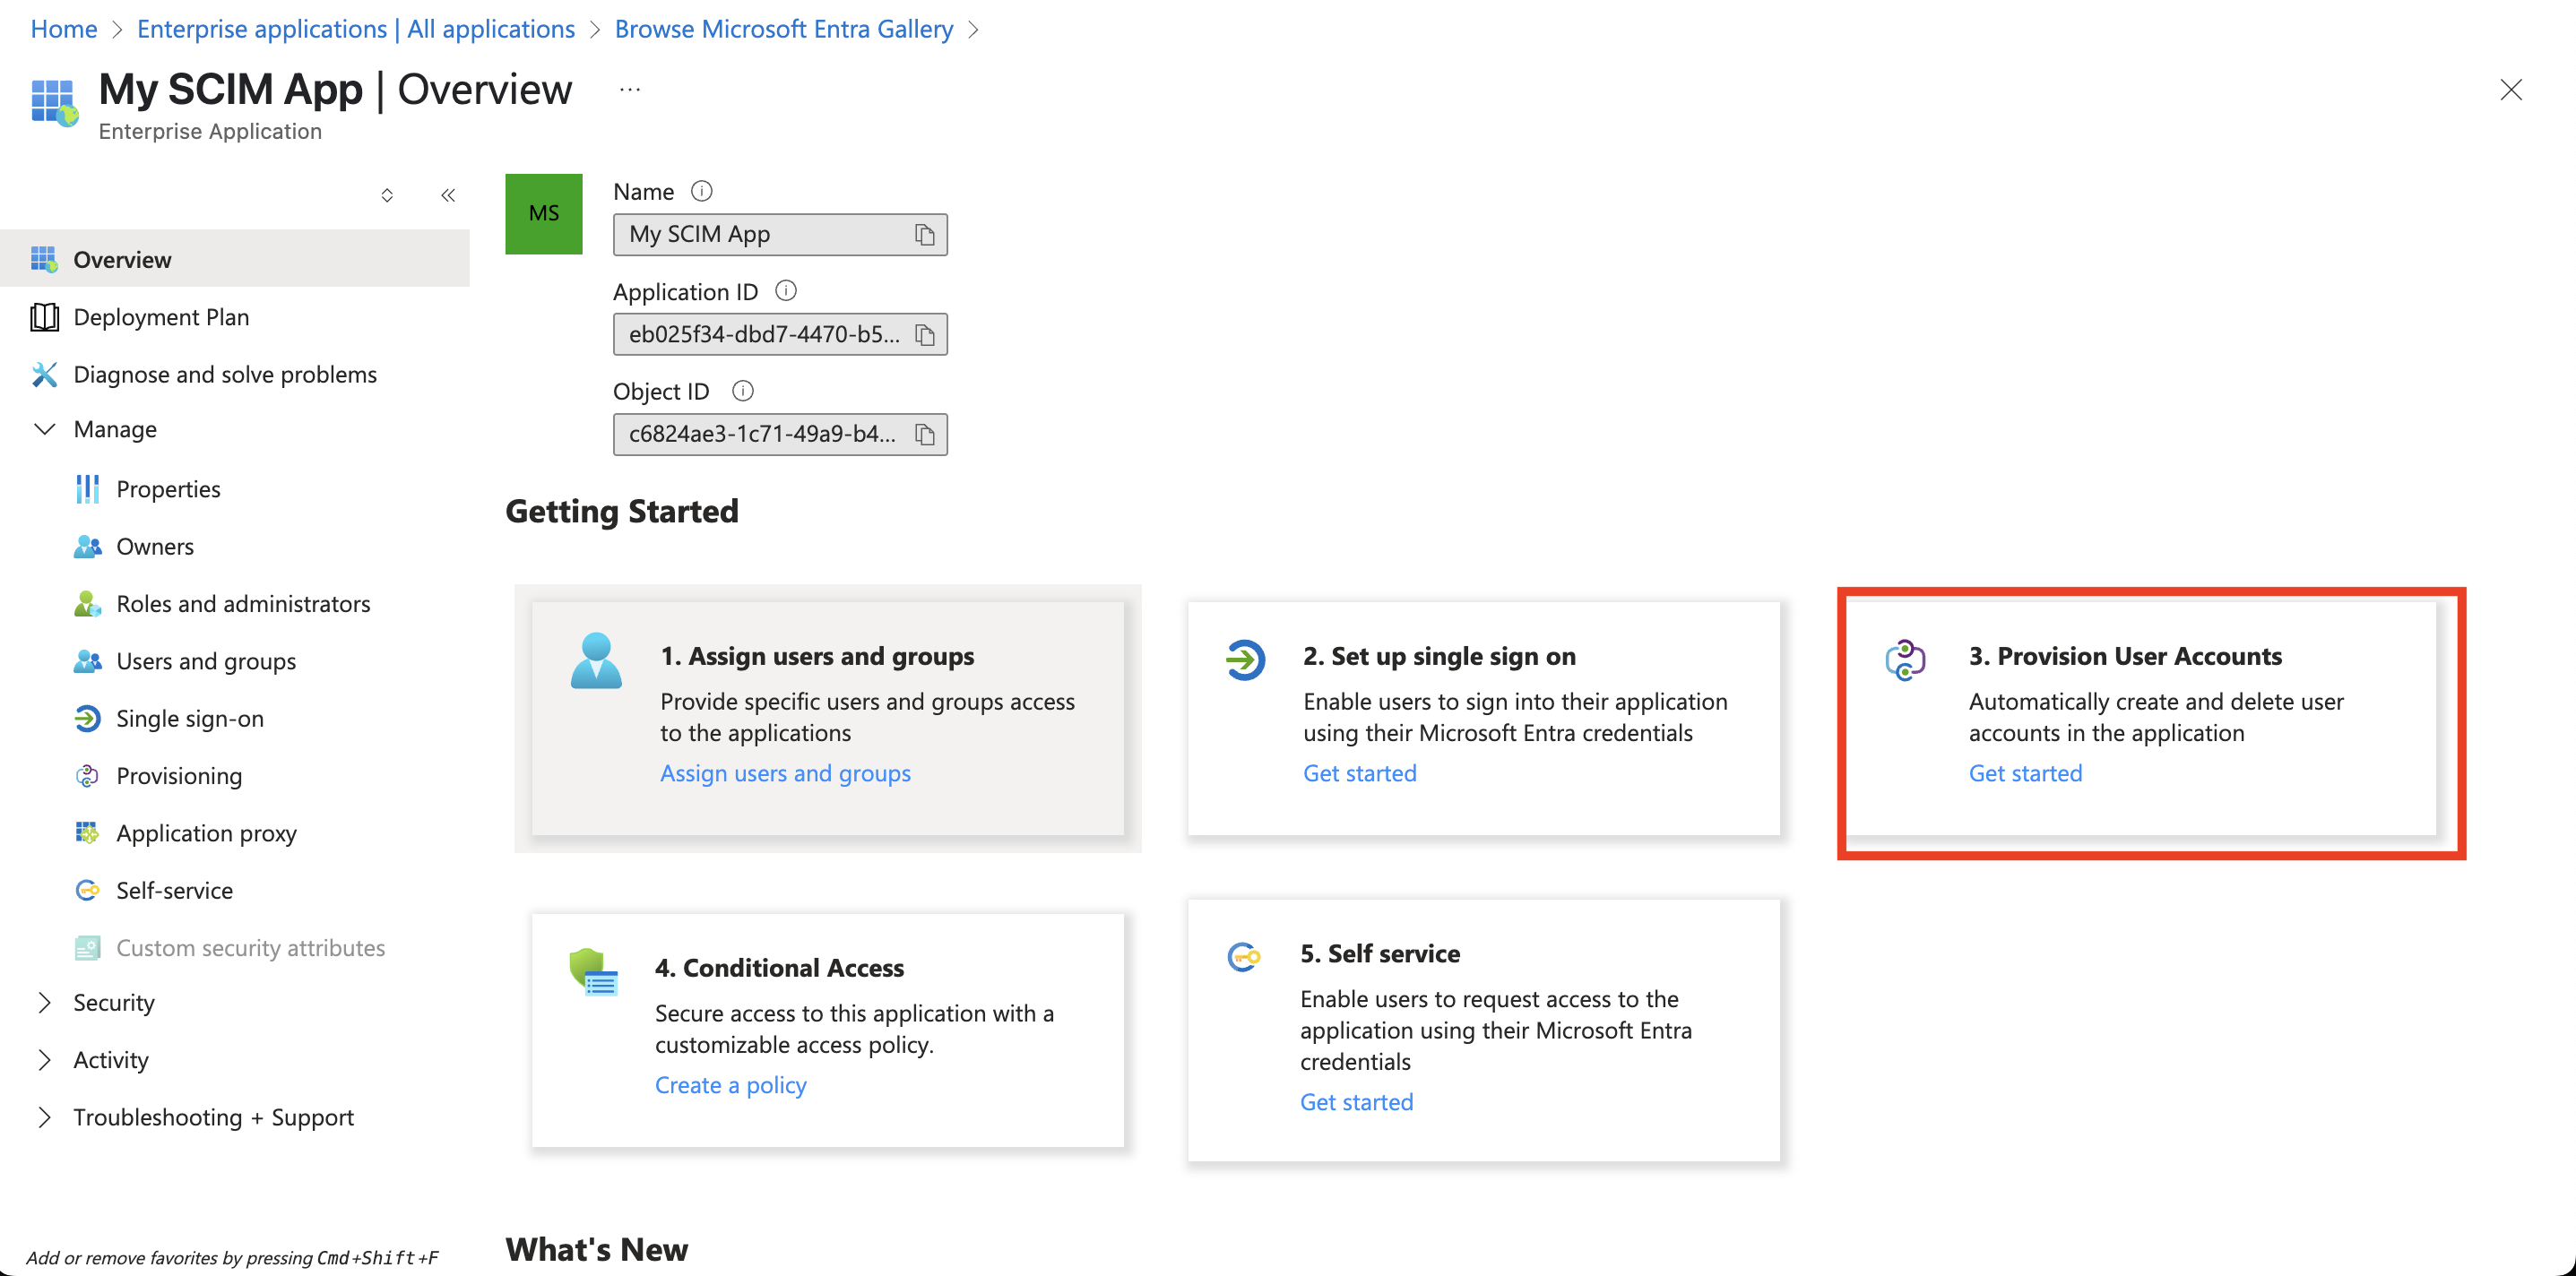
- From the application Overview screen, click Provision User Accounts.
- From the Create configuration section, click Connect your application
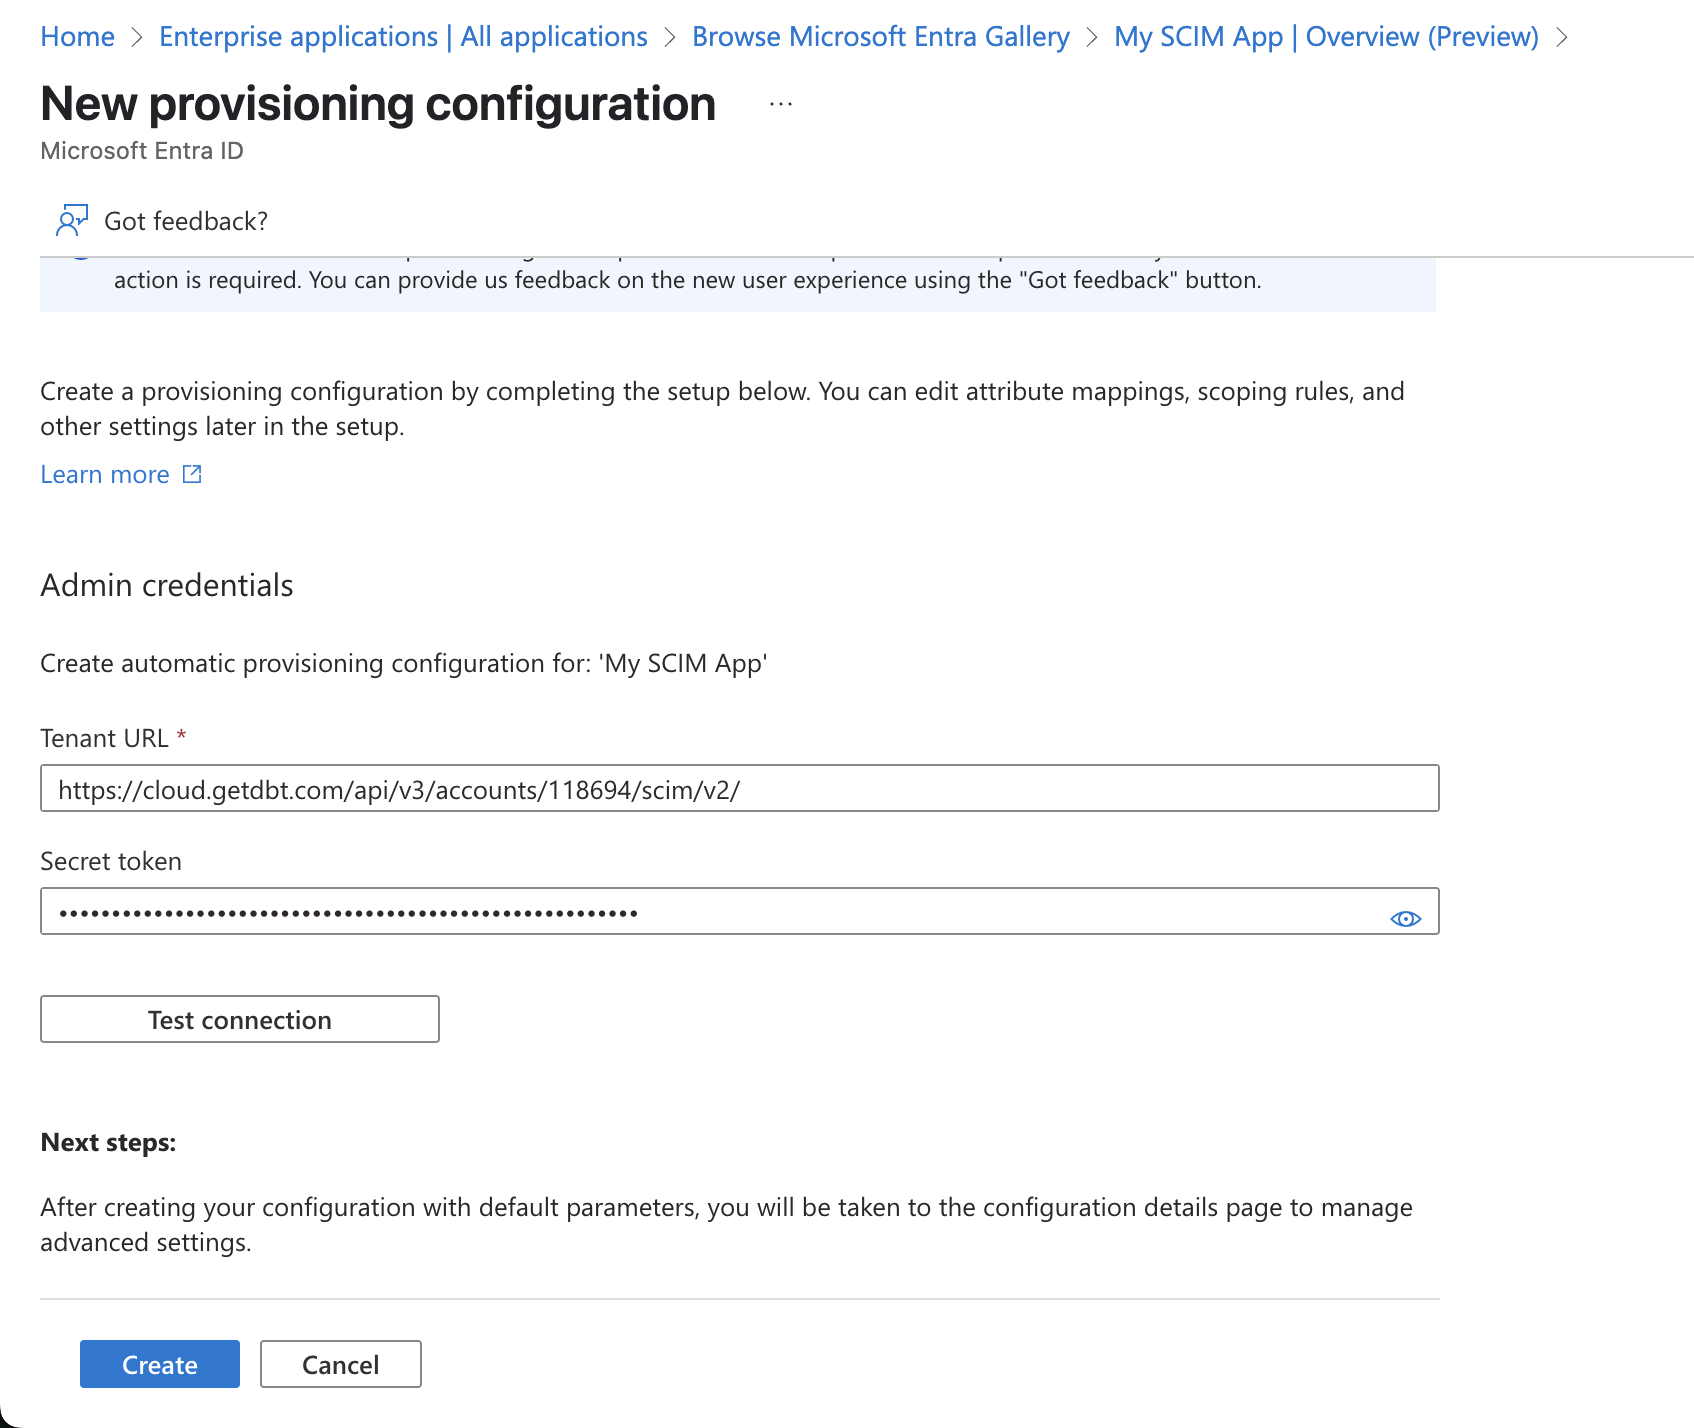
- Fill out the form with the information from your dbt account:
- The Tenant URL in Entra ID is your SCIM based URL from dbt
- The Secret token in Entra ID is your SCIM token* from dbt
- Click Test connection and click Create once complete.
Attribute mapping
To map the attributes that will sync with dbt:
-
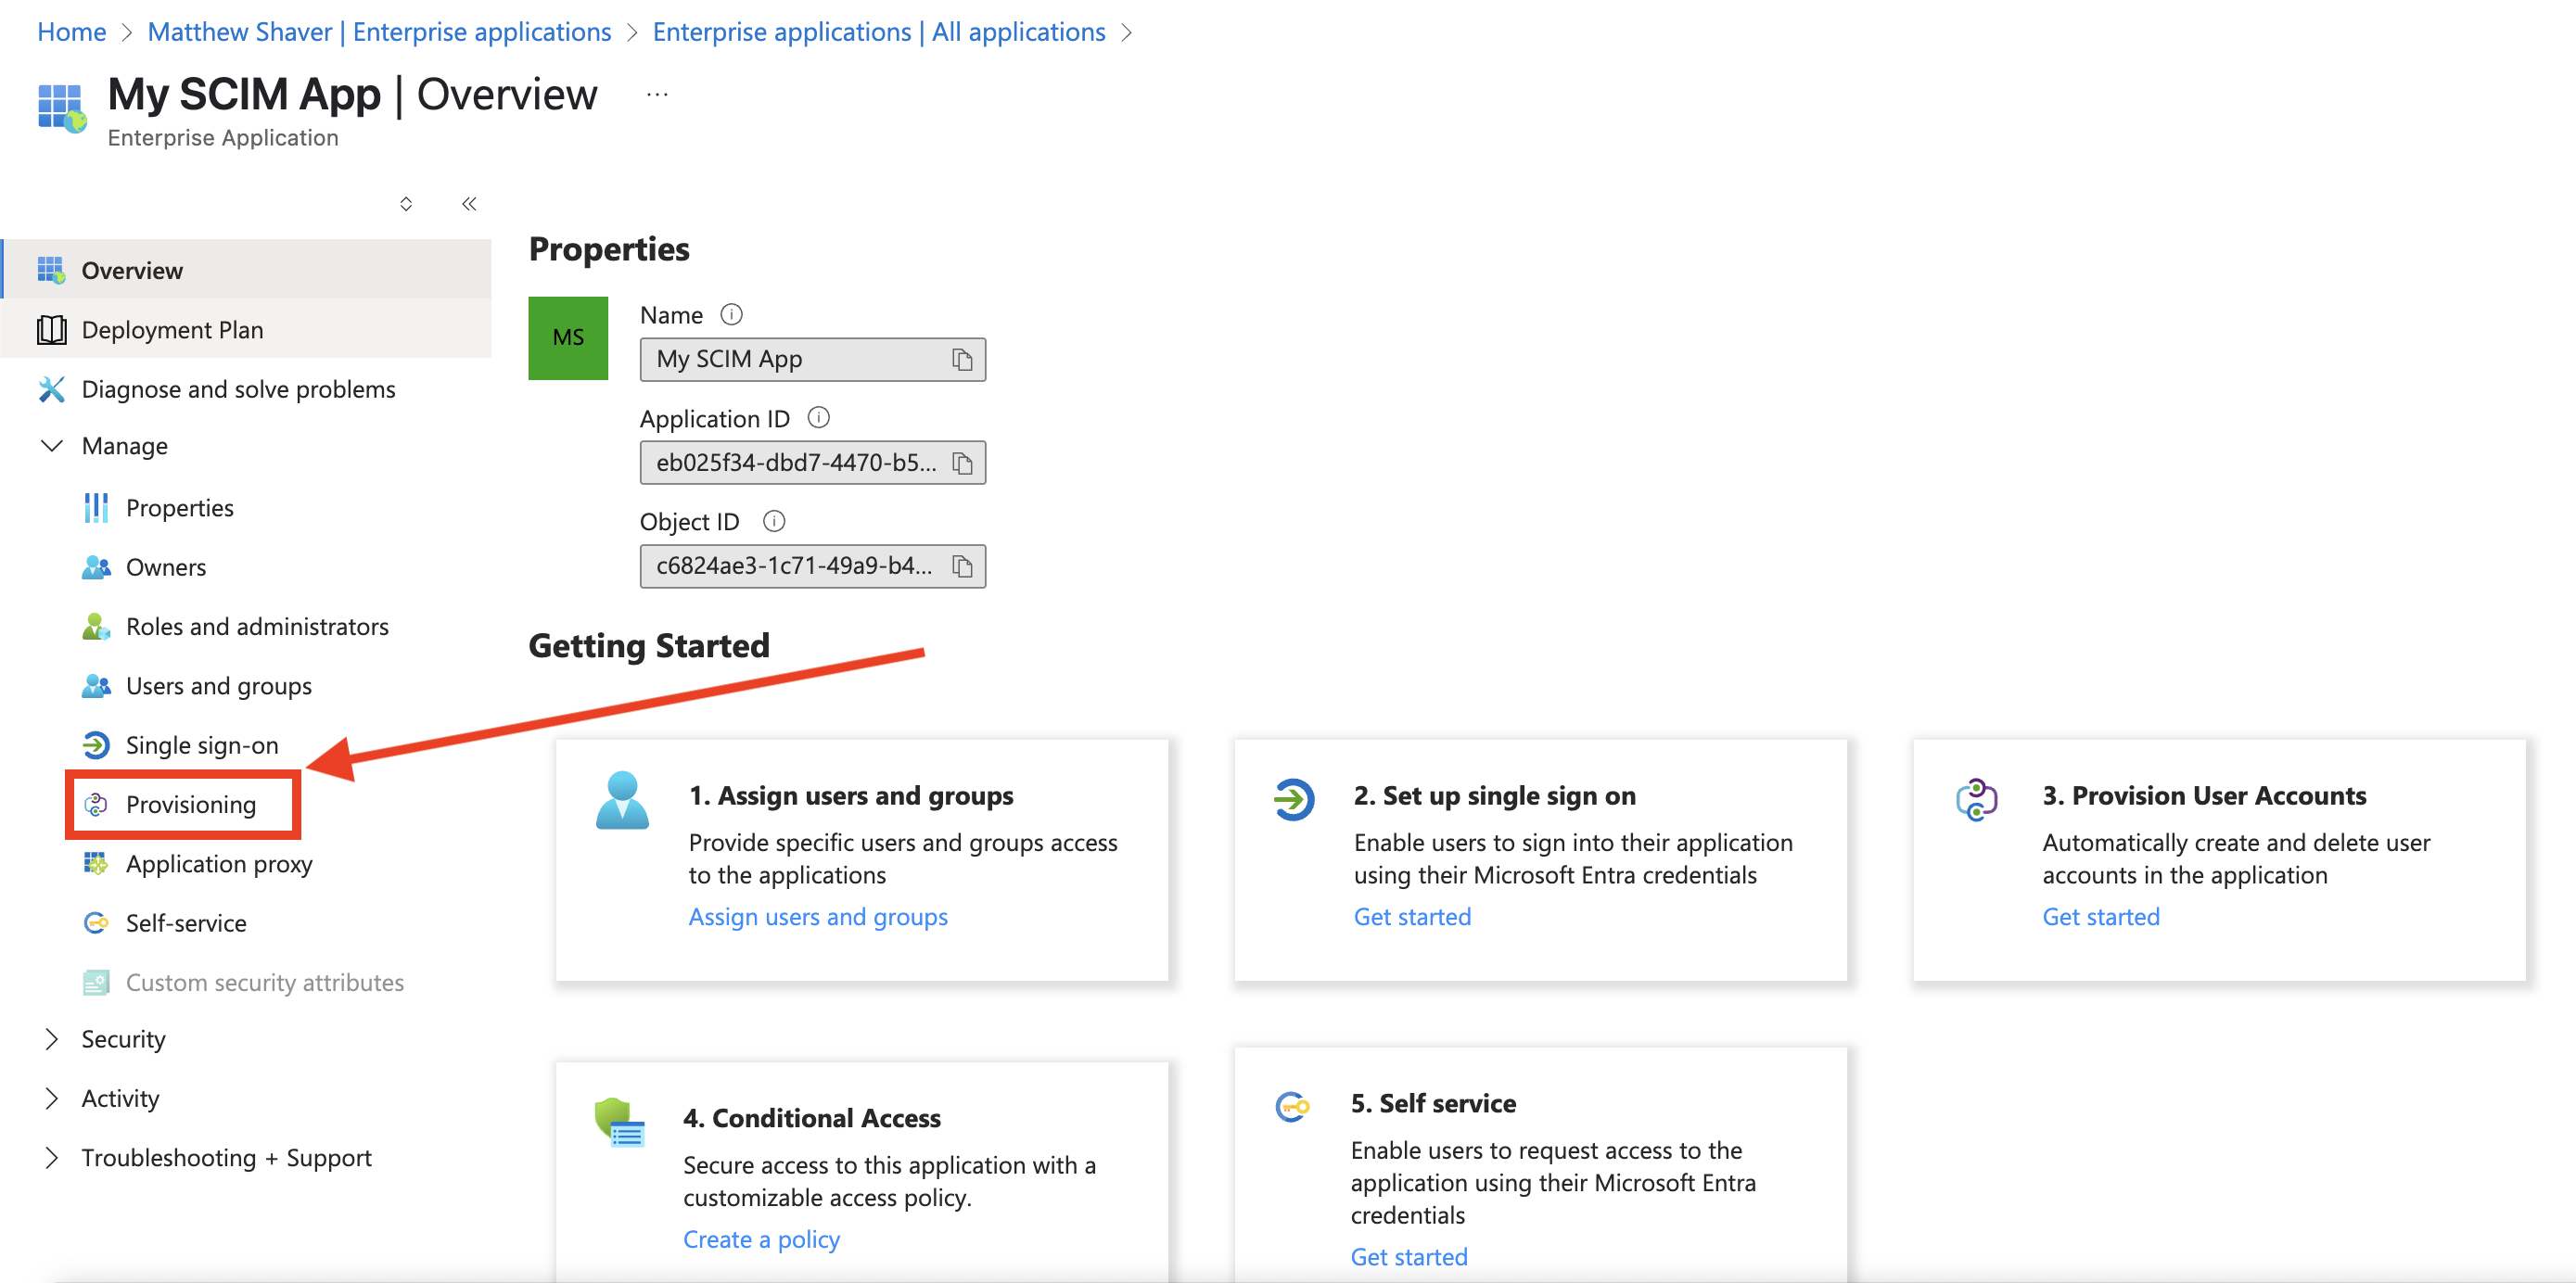
From the enteprise app Overview screen sidebar menu, click Provisioning.
-
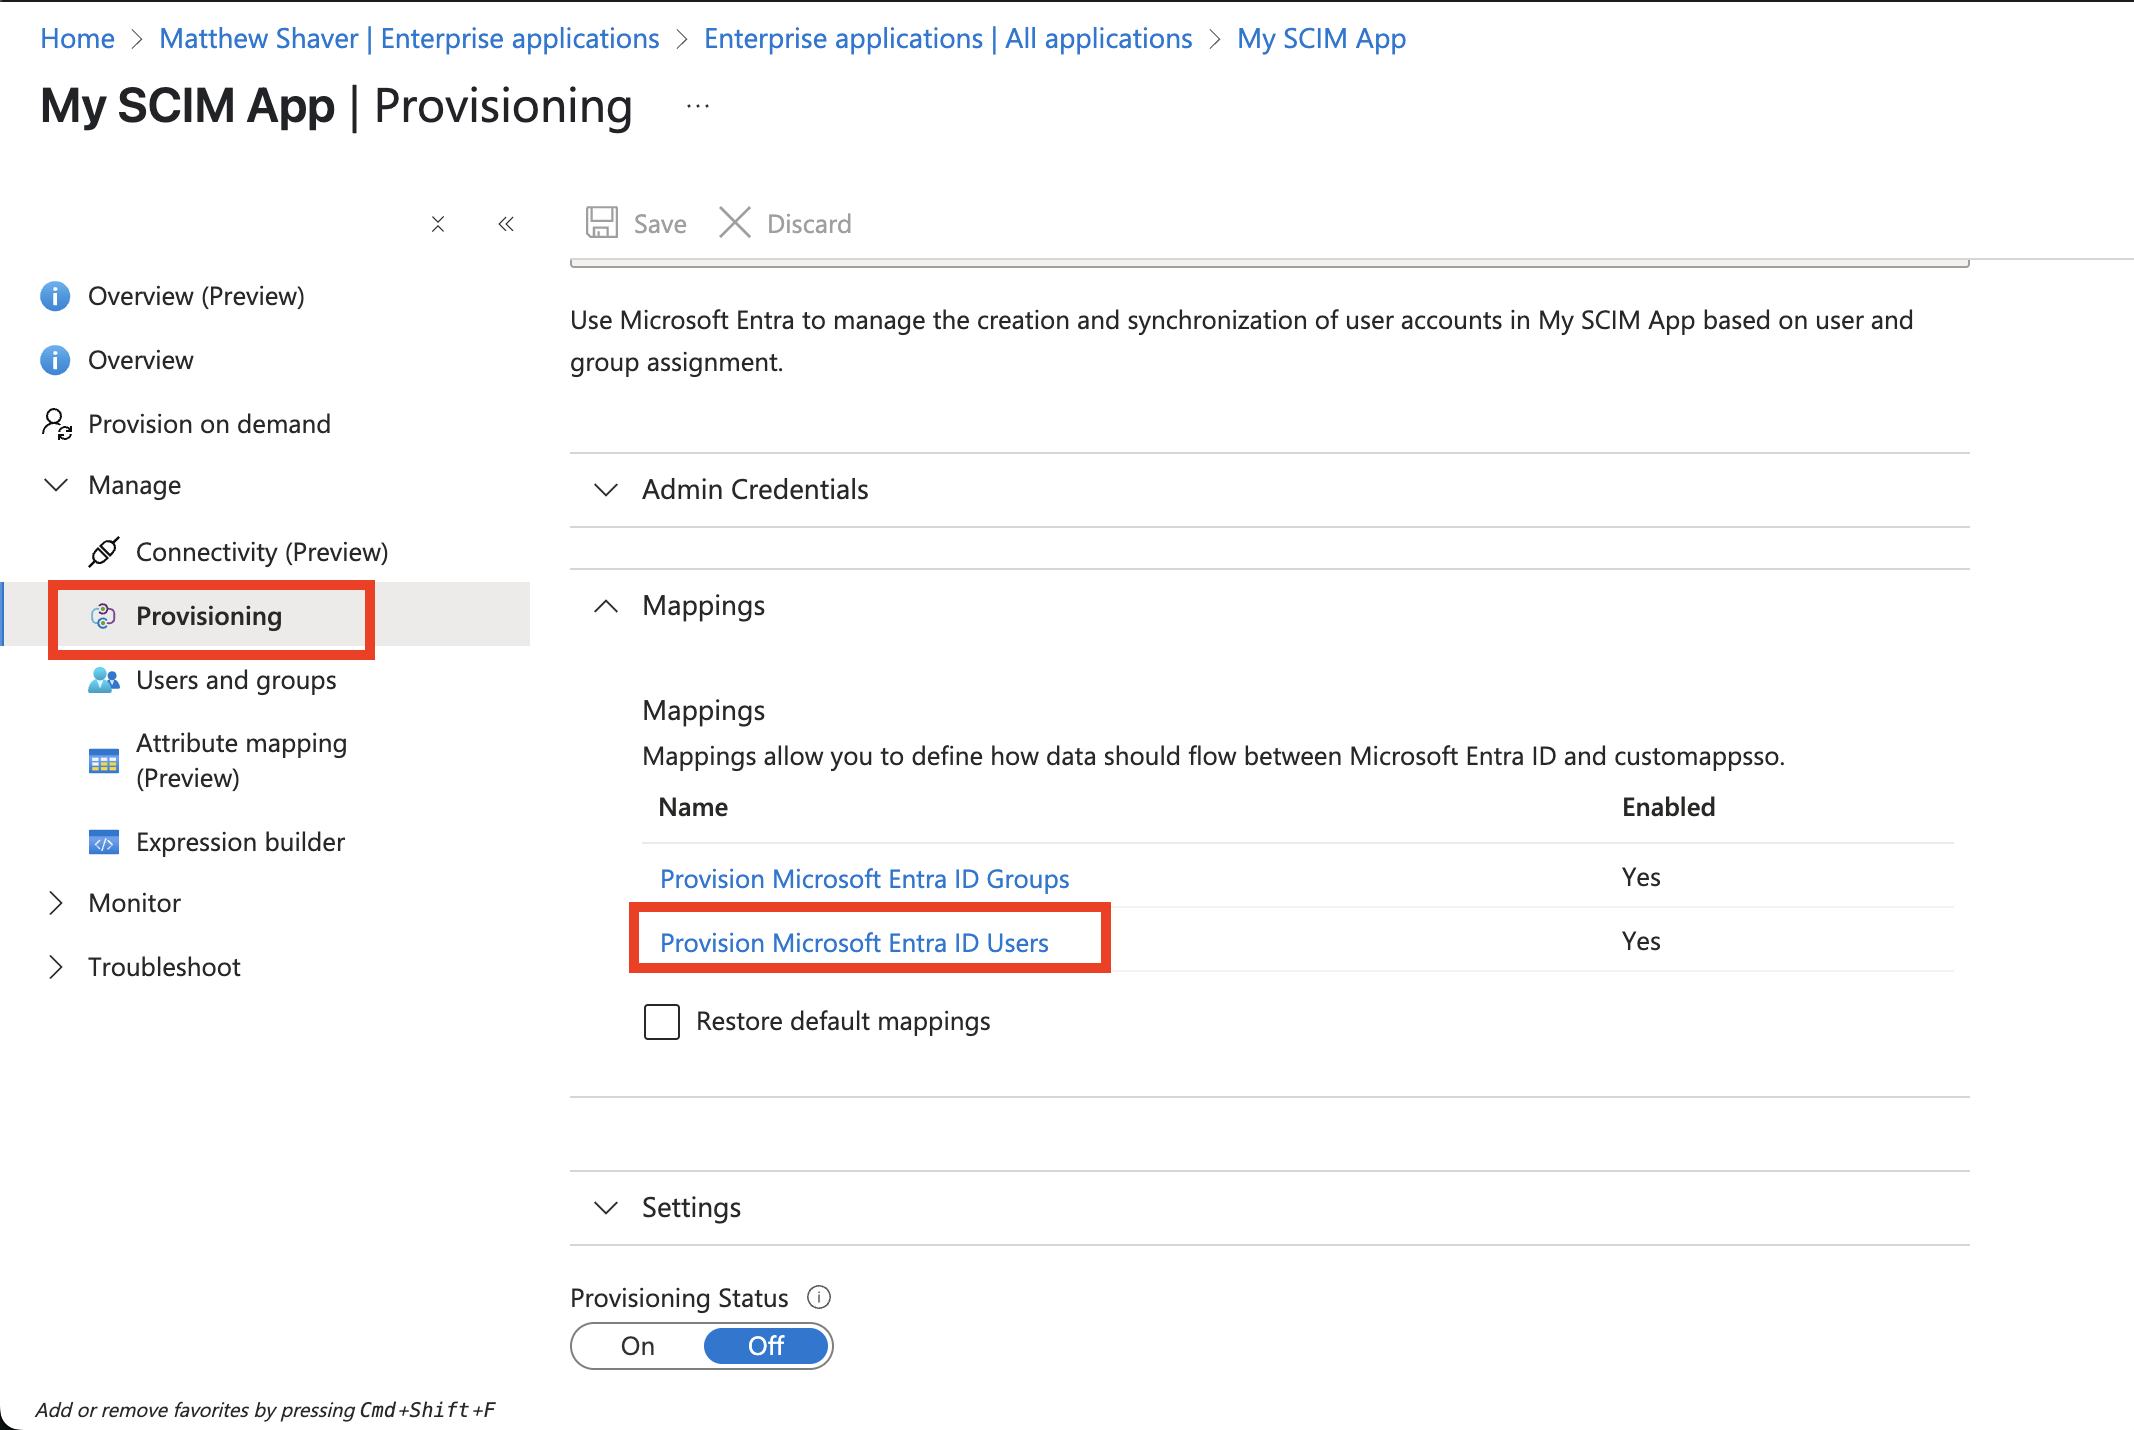
From under Manage, again click Provisioning.
-
Expand the Mappings section and click Provision Microsoft Entra ID users.
-
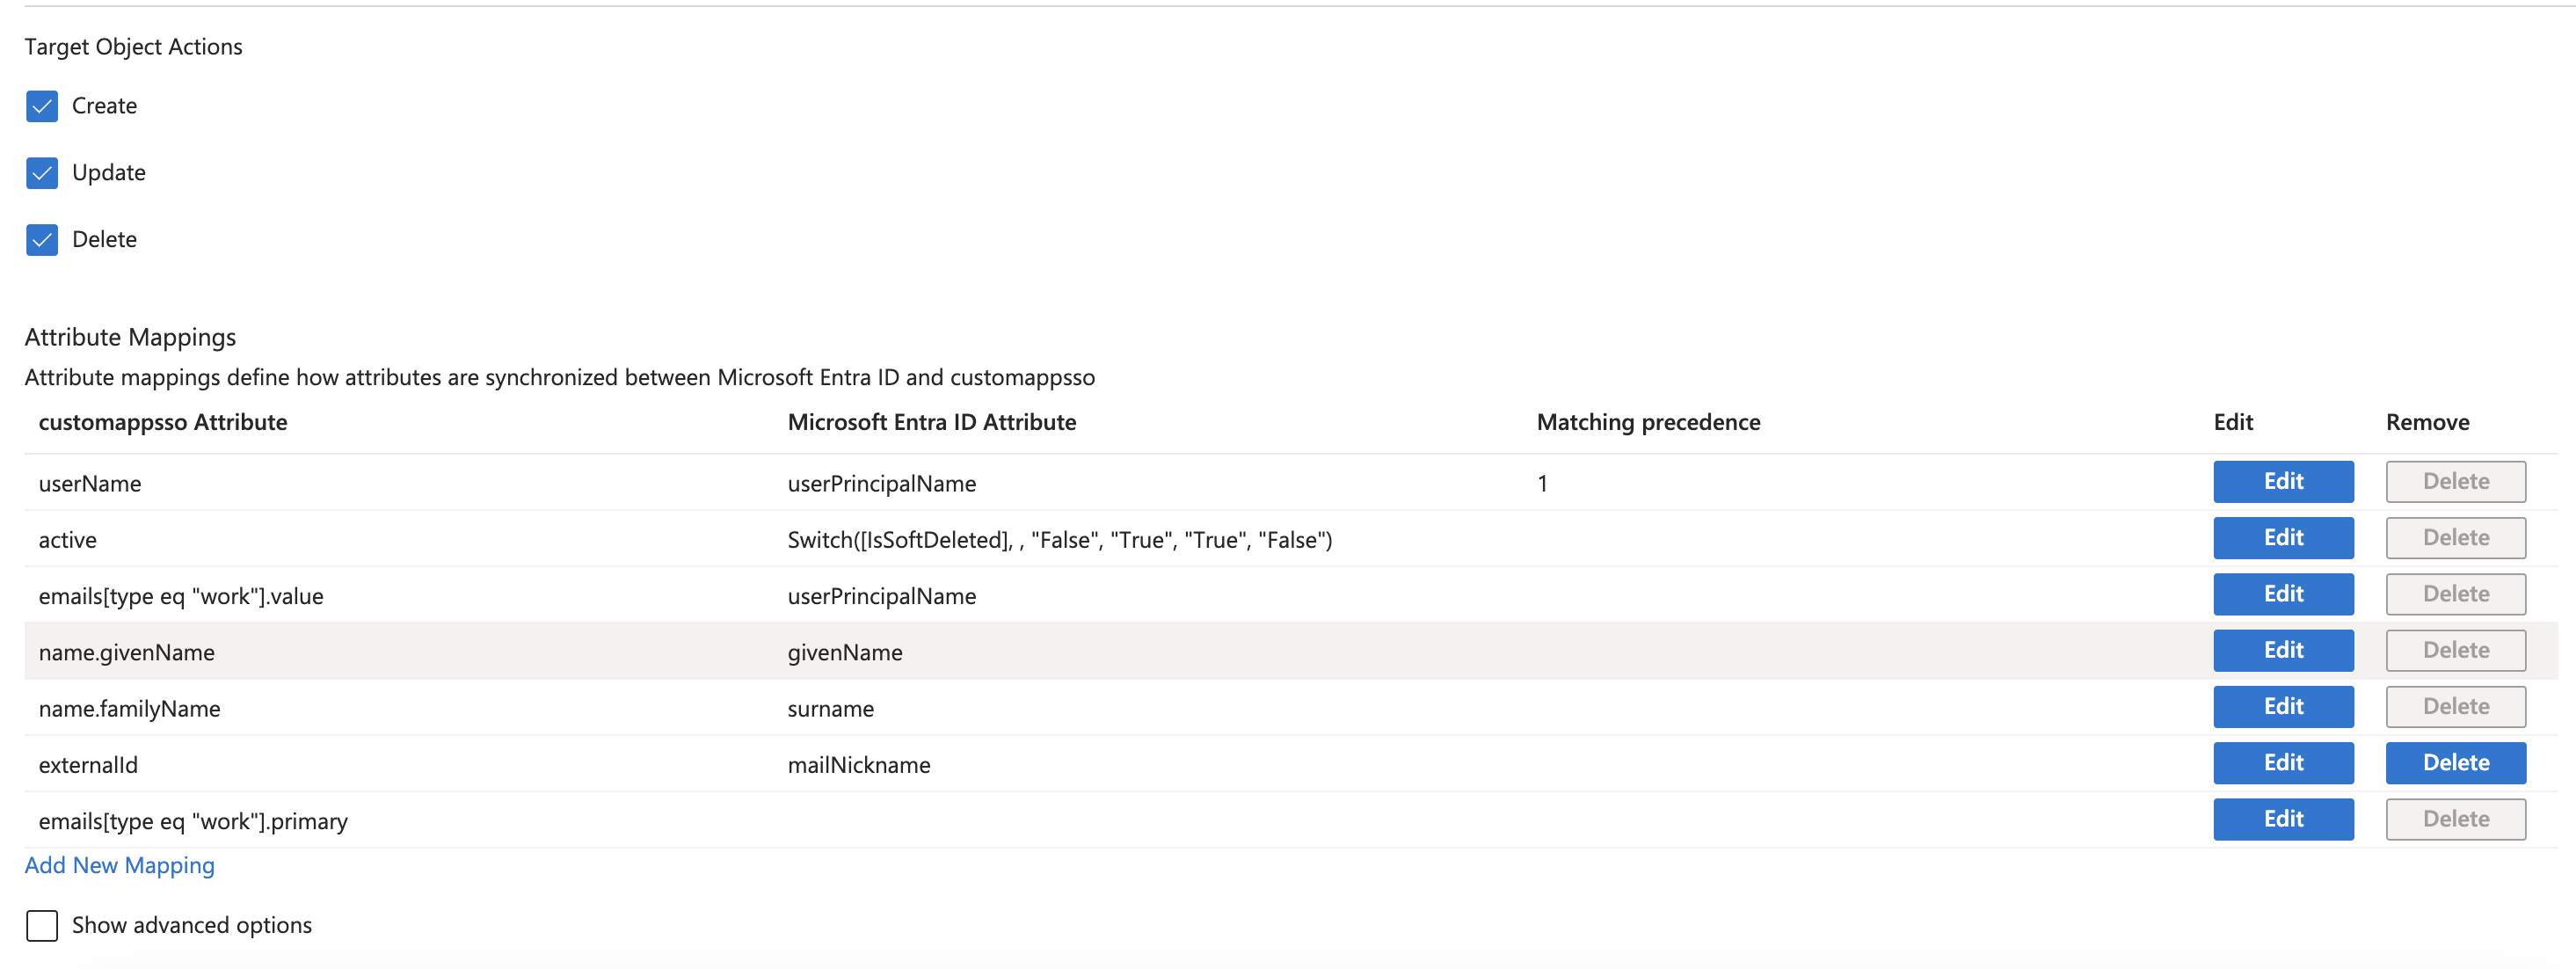
Make sure the following mappings are in place and delete any others:
- UserName:
userPrincipalName - active:
Switch([IsSoftDeleted], , "False", "True", "True", "False") - emails[type eq "work"].value:
userPrincipalName - name.givenName:
givenName - name.familyName:
surname - externalid:
mailNickname - emails[type eq "work"].primary (see next step)
- UserName:
-
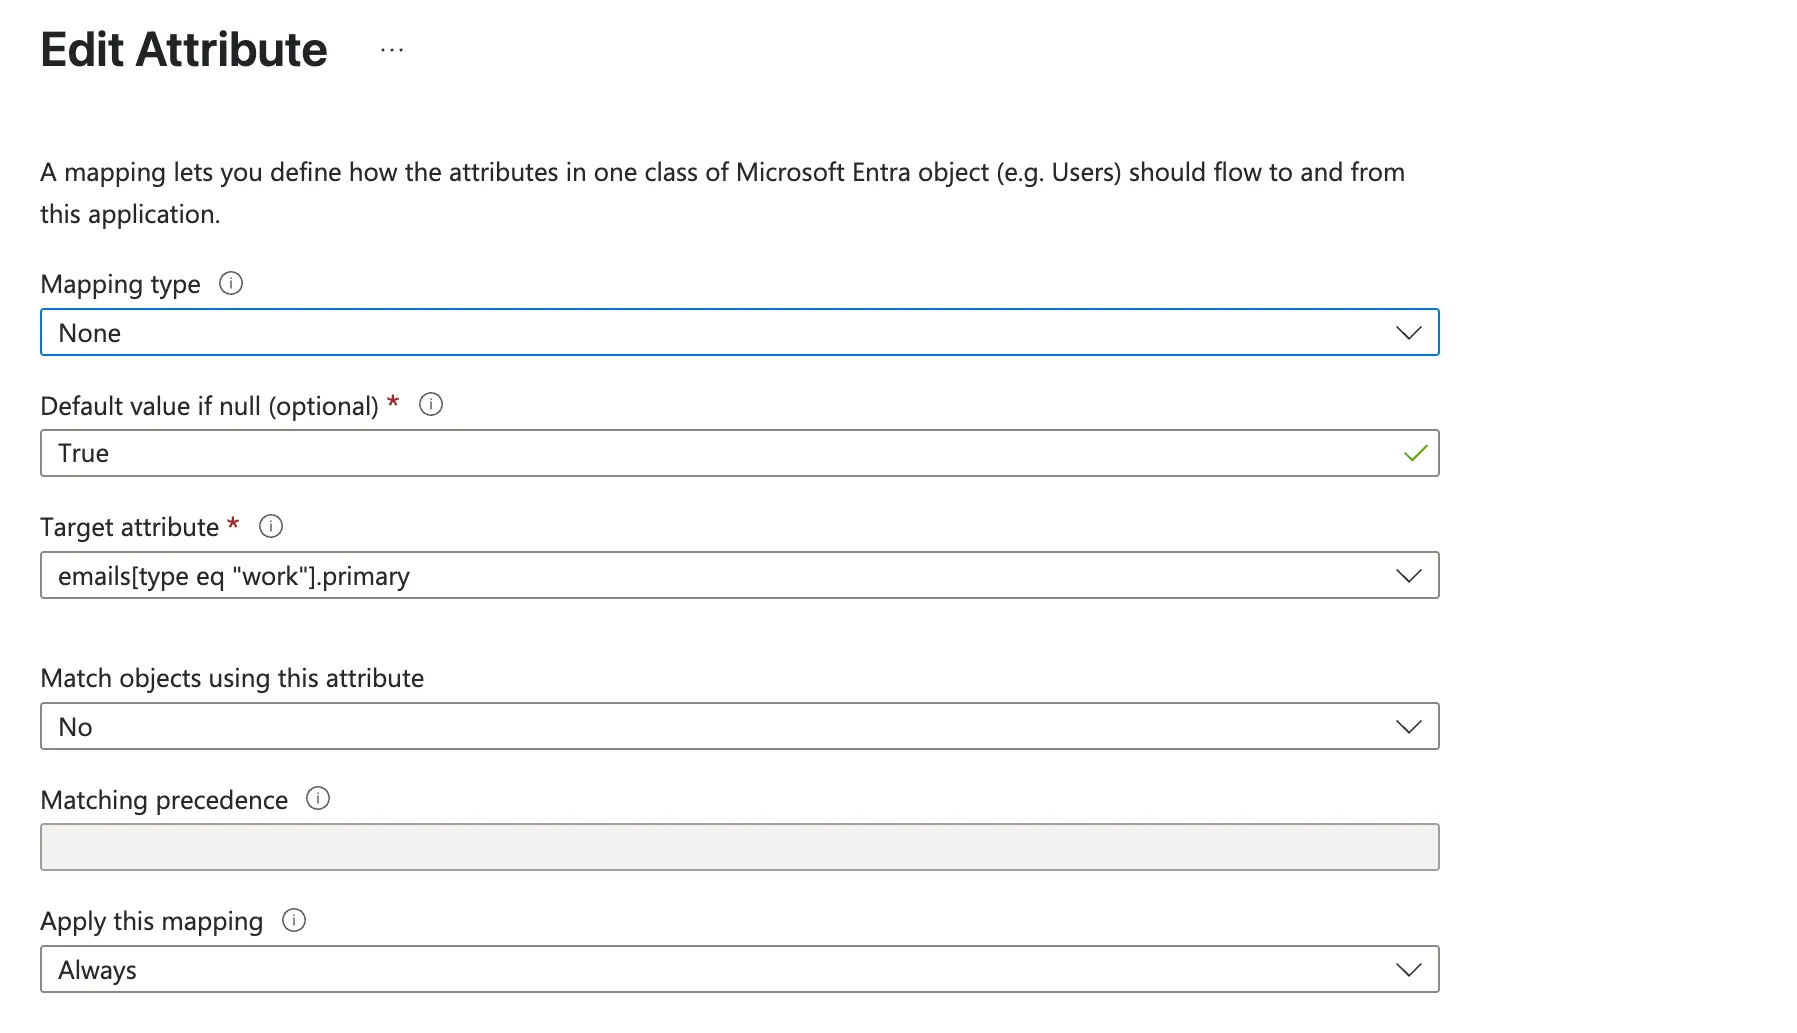
Click Add new mapping and fill out the fields with the following:
- Mapping type:
none - Default value if null (optional):
True - Target attribute:
emails[type eq "work"].primary - Match objects using this attribute:
No - Matching precedence: Leave blank
- Apply this mapping:
Always
- Mapping type:
-
Click Ok
-
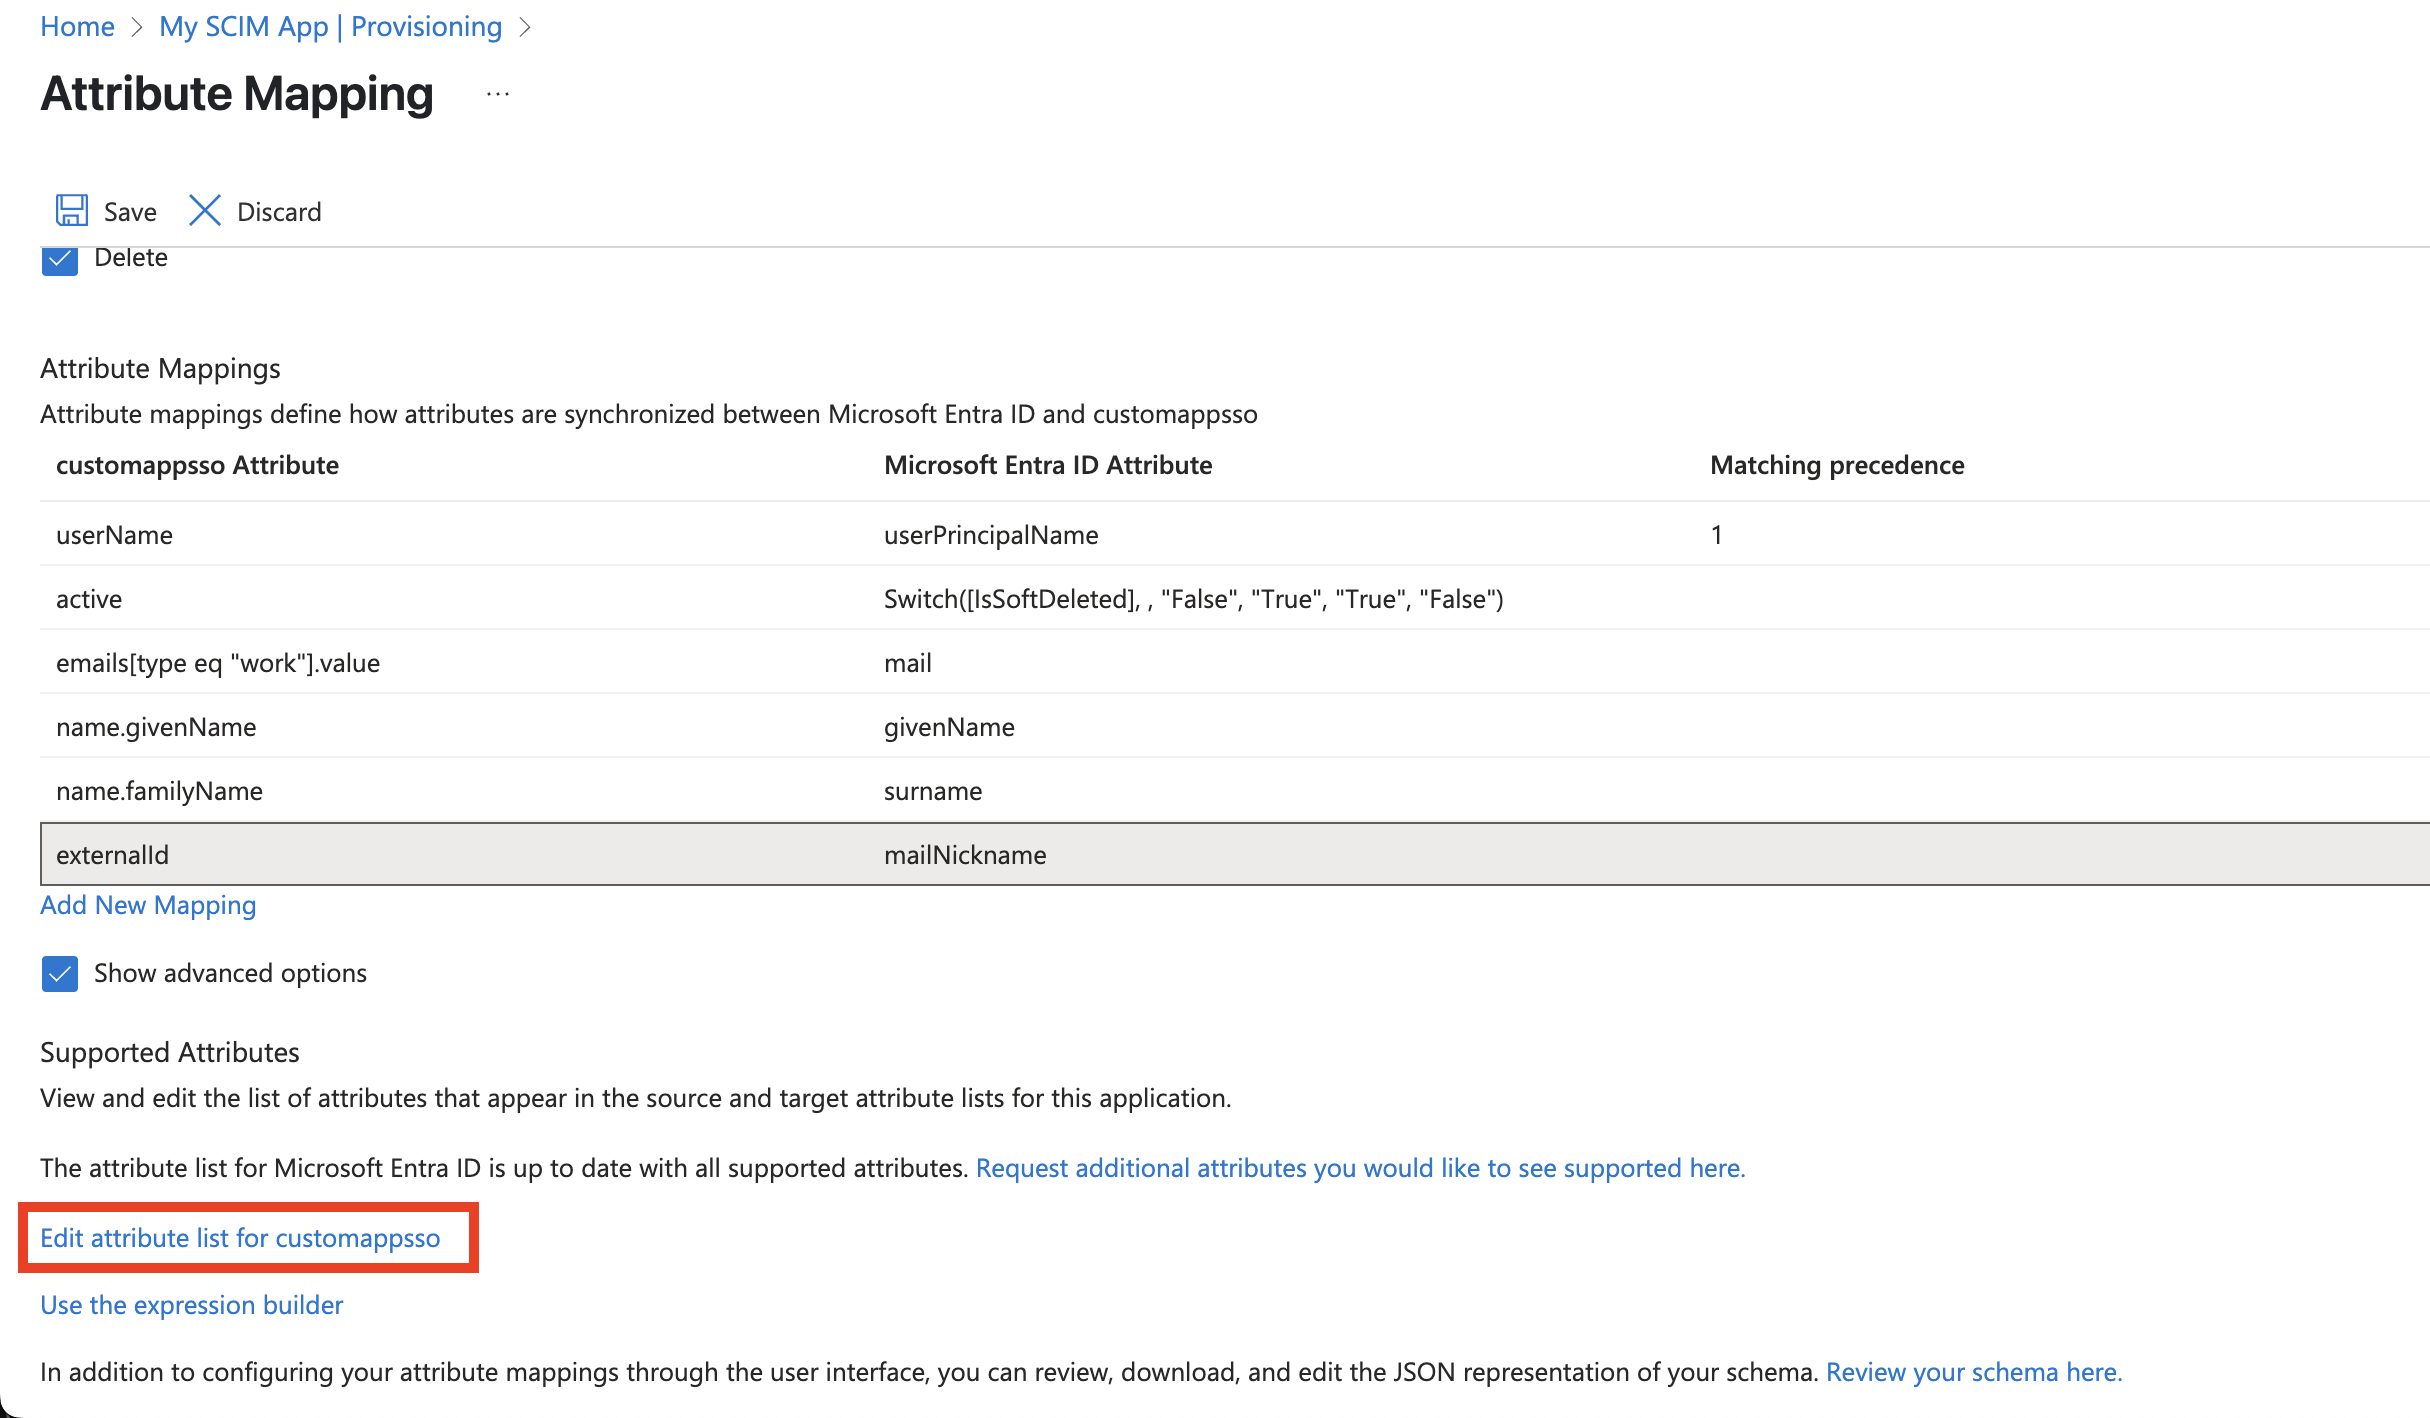
Back on the Attribute mapping screen, click the checkbox to Show advanced options
-
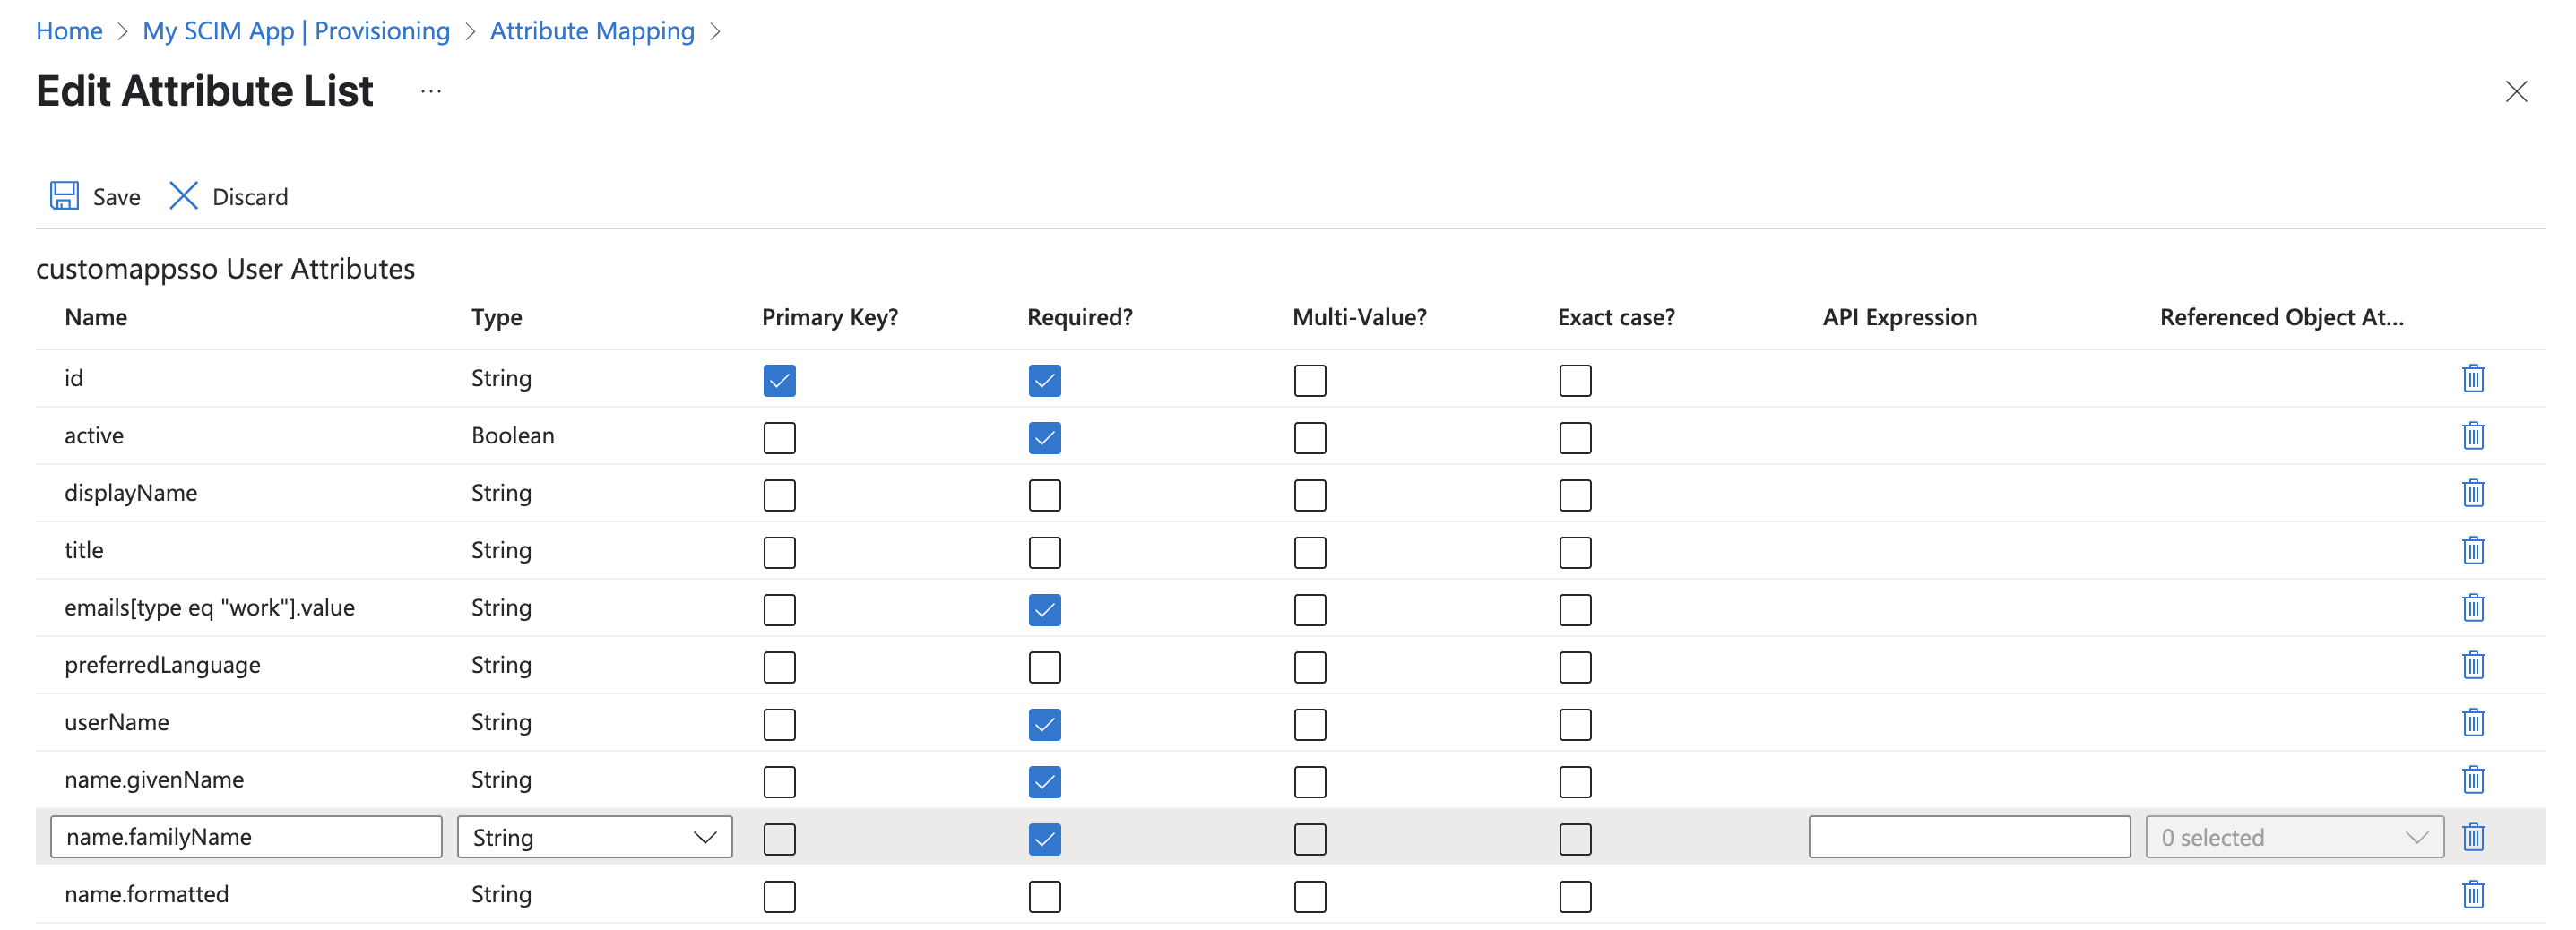
Mark all of the fields from Step 5 as
Requiredand click Save.
You can now begin assigning users to your SCIM app in Entra ID!
